How to Install Wine on Ubuntu 24.04: Step-by-Step Guide

The Windows ecosystem is bigger than the Linux ecosystem. As a result, some application and system developers create software exclusively for Windows OS only and overlook Linux. This can be a challenge for Linux users who need applications that are only available on Windows.
Hopefully, a free Linux utility called Wine adds a layer to your Linux distribution that allows you to run Windows applications. In this guide, you'll learn about Wine and how to install it on Ubuntu 24.04.
#Prerequisites
You need to have installed Ubuntu 24.04. In addition, make sure your machine supports the 32-bit architecture and has graphic drivers that will be used to run graphics-intensive software when using Wine.
#What is Wine?
Wine stands for Wine is not an Emulator. Wine takes a different approach from virtual machines by changing Windows API calls into real-time POSIX(Portable Operating System Interface) calls. POSIX specifies a standard set of system calls and libraries that operating systems should support. Wine was released in 1993 and still receives critical updates despite depending on volunteers to push updates. Wine version 9.20, released on the 18th of October 2024, comes with features such as:
- Static analysis.
- JUnit test reports in GitLab CI.
- Extensive support for DirectPlay network sessions.
Wine is an open-source software project. A company called CodeWeavers forked the Wine codebase and created a new product based on Wine called Crossover. Unlike Wine, Crossover is a paid tool.
Wine allows you to enjoy both worlds: Linux-based applications and Windows-based applications without having to buy a Windows machine. Wine helps users transition from Windows to Linux without losing access to their favorite Windows applications, such as Microsoft Excel. That's a cost saver. This enables you to:
- Test Windows applications.
- Collaborate with developers who use Windows applications.
- Use Windows tools and utilities.
Wine enables remote access to Windows applications and offers remote administration capabilities. It uses the flexible and stable Unix operating system, which facilitates multi-user and multi-tasking programs.
Deploy and scale your projects with Cherry Servers' cost-effective dedicated or virtual servers. Enjoy seamless scaling, pay-as-you-go pricing, and 24/7 expert support—all within a hassle-free cloud environment.
#How to install Wine on Ubuntu 24.04
Follow the steps below to install Wine on Ubuntu 24.04 successfully.
1. Update and upgrade the Ubuntu package list
Before installing Wine, update and refresh the Ubuntu package list using the following command. In Linux, packages can be system libraries that provide basic functionalities such as handling input and output, file systems, or networking. Not updating packages before installing Wine can cause compatibility and performance issues.
sudo apt update
Next, upgrade all packages using the following command.
sudo apt upgrade -y
2. Enable the 32-bit architecture to support 32-bit Windows applications
Unlike many software programs, Wine uses the 32-bit architecture. This is because most Windows programs still use the 32-bit architecture. To verify that Wine can execute 32-bit Windows apps, run the command below on a 64-bit Ubuntu.
sudo dpkg --add-architecture i386
3. Create a keyring and download the Wine repository key
Wine has a repository key that verifies the integrity of the packages retrieved from the Wine repository. This repository key has to be stored in a keyring. In Linux, keyrings are used to store sensitive data safely. Use the following command to create a keyring for the Wine repository key.
sudo mkdir -pm755 /etc/apt/keyrings
Next, download the repository key and store it in the previous keyring you created.
sudo wget -O /etc/apt/keyrings/winehq-archive.key https://dl.winehq.org/wine-builds/winehq.key
4. Add the Wine repository source file to Ubuntu
Use the following command to add the Wine repository source file to Ubuntu. By adding the official WineHQ repository, you will receive access to the most recent stable, development, or staging versions of Wine, which include new improvements, and bug fixes not found in the usual Linux repositories.
sudo wget -NP /etc/apt/sources.list.d/ https://dl.winehq.org/wine-builds/ubuntu/dists/jammy/winehq-jammy.sources
5. Synchronize the Ubuntu system to apply changes
Next, synchronize your Ubuntu system using the following command to apply the previous changes you made.
sudo apt update
6. Install the stable version of Wine
Finally, use the following command to install Wine:
sudo apt install --install-recommends winehq-stable -y
7. Confirm if the Wine installation was a success by checking the version
To confirm that Wine has been installed successfully, run the following command:
wine --version
You will get the following similar output that shows the installed Wine version:
#How to use Wine on Ubuntu
To configure Wine, execute the following command on the Ubuntu terminal.
winecfg
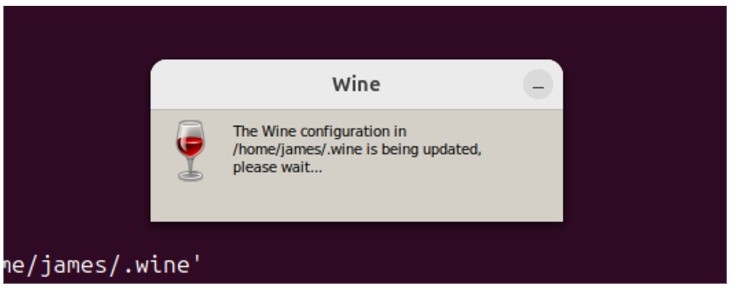
Once you run the command, a configuration environment will be set up in your home directory.
Next, you will get the following output: a Wine GUI prompting you to install the Wine-mono package needed for running applications. Click on the install button.
Next, the Wine configuration GUI will be displayed as shown below. This configuration setup allows you to add Windows applications.
Since Wine emulates the Windows layer on top of Linux, its configuration setup allows you to change graphics settings such as screen resolution. You can also add drives and audio specifications using this configuration setup.
In this step, we will enable a virtual desktop and specify the resolution. So on the Wine Configuration window, select the Graphics tab then check the Emulate a virtual desktop option. Next, specify the resolution size. In our case, we have specified the resolution as 640 * 600.
Adding an inappropriate Desktop size will cause the Wine home GUI to crash and fail to pop up.
After adding the new changes make sure you click on the “apply” button to add the changes. Close the Wine configuration GUI and execute the wineboot command to initiate the new changes.
wineboot
The default Wine GUI does not include any Windows application. As you can see from the screenshot below the GUI only shows the “start” button.
Keep in mind that Wine will keep crashing if your machine has insufficient memory. Ensure your system is running with at least 8GB of RAM and a mid-range GPU for best results.
#How to install a Windows application with Wine
In this section, you will learn how to install a Windows application in Ubuntu using Wine. There are two ways to do this: the CLI and the Wine Virtual desktop. We will explore both of these avenues.
#Install a Windows application from the CLI using wine
To demonstrate installing a Windows application with Wine, we will install the VLC media player, a free and open-source cross-platform media player.
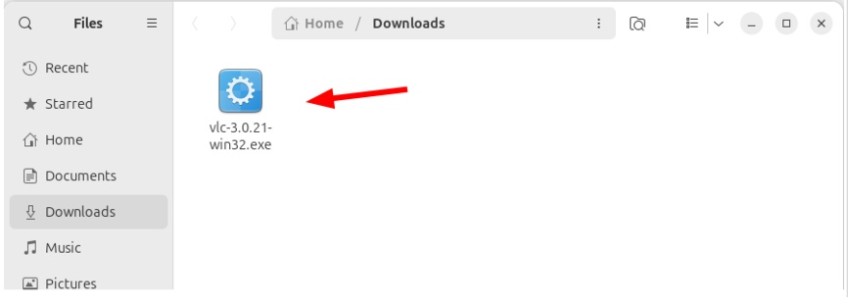
So, head to the VLC media player Downloads page and download the Windows.exe installation file.
By default, this goes to the Downloads directory.
To install VLC from the downloaded .exe file, use the following syntax:
wine /path/to/exe/file
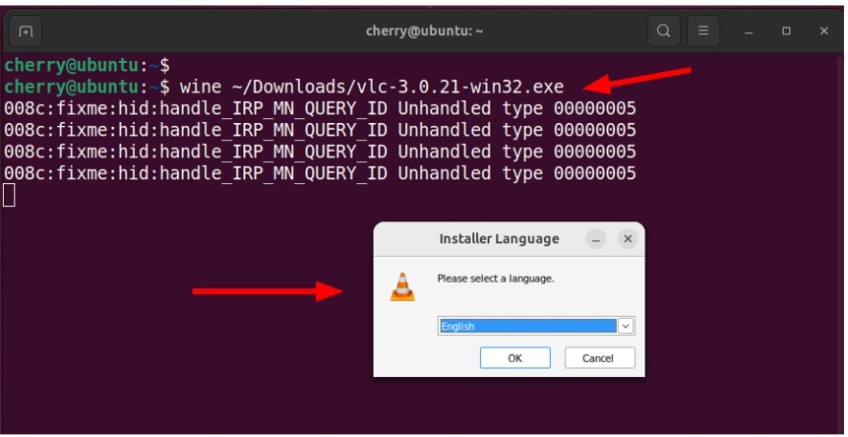
In this case, the command will be:
wine ~/Downloads/vlc-3.0.21-win32.exe
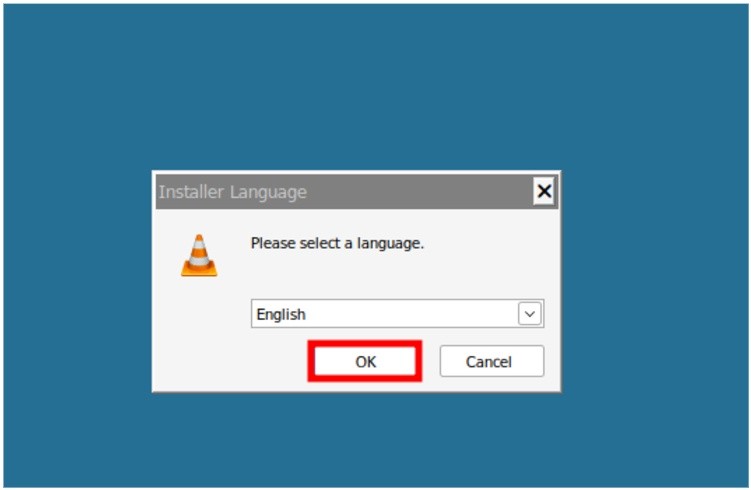
The command launches the VLC installer and you will be prompted to select the installation language.
From here, the installation wizard will walk you through the installation to the very end. Simply accept the defaults by clicking “Next” right to the last step to complete the installation.
#Install a Windows application using the Wine virtual desktop
The Wine virtual desktop provides a convenient way of installing a Windows application using the GUI. This section assumes you have already downloaded the .exe file. For consistency, we will go with the VLC .exe file from the previous step.
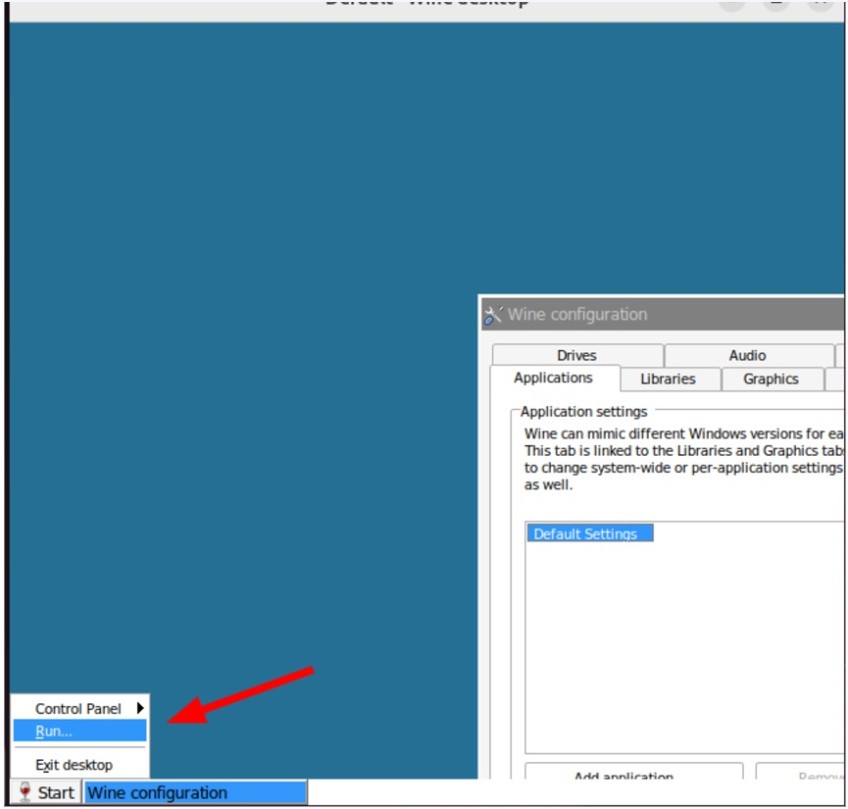
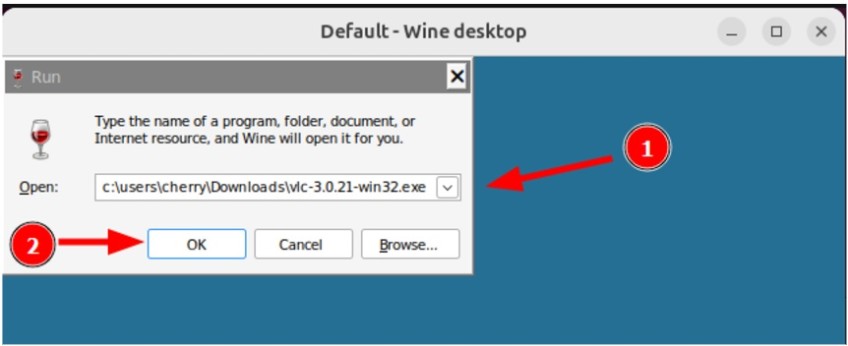
On the Wine virtual desktop, click Start > Run.
On the Run dialogue box, type in the full path of the VLC .exe file. The path should mimic the Windows path to the Downloads folder in which the .exe resides. In our case, this will be c:\users\cherry\Downloads\vlc-3.0.21-win32.exe.
Then click OK to launch the installation Wizard.
The installation Wizard will pop open, and like in the previous subheading, you will be required to select the installation language.
Proceed with the installation by clicking Next and accepting the default selections.
And that’s how you go about installing a Windows application using Wine.
#Conclusion
In this tutorial, you have learned what Wine is in detail and how to install it on Ubuntu 24.04. In addition, you have learned how to start Wine using the wineboot command and configure Wine using the winecfg command.
Adding Wine to your Linux machine increases the demand for resources such as memory and CPU. Wine will add more applications and processes to your existing Ubuntu applications and processes. This high resource demand can cause resource insufficiency, which in turn causes applications to crash. You can solve this issue by acquiring Cherry Servers bare metal solutions, which offer unlimited cloud resources at a low cost.
Cloud VPS Hosting
Starting at just $3.24 / month, get virtual servers with top-tier performance.


