How to Install Webmin on Ubuntu 24.04: Step-by-Step Guide


Running system administration tasks on the CLI can sometimes be tedious and challenging. Especially for beginners who have not yet fully mastered administering the system from the CLI. Thankfully, there are a couple of graphical tools to make life easy.
Webmin is a modern web-based tool that streamlines system administration tasks. It provides a simple yet feature-rich dashboard for administering a server on the browser. Top-of-mind administration tasks include automating tasks through cron jobs, user account and package management, and more.
#Prerequisites
To start, ensure you have the following in check.
- An instance of Ubuntu 24.04. You can get started by deploying an affordable VPS server at Cherry Servers.
- A sudo-privileged user account for running administrative tasks.
Deploy and scale your projects with Cherry Servers' cost-effective dedicated or virtual servers. Enjoy seamless scaling, pay-as-you-go pricing, and 24/7 expert support—all within a hassle-free cloud environment.
#Installing Webmin on Ubuntu 24.04
Predominantly developed in Perl, Webmin is an excellent choice for beginners and users who prefer the simplicity of administering and monitoring a system graphically. No command-line skills are required (although it does offer a provision for running commands). This guide explores how to install Webmin on Ubuntu 24.04.
#Step 1. Update the package index
To get started, update the local package index to update the list of package information from their repositories.
sudo apt update
You should get a similar output to what we
OutputHit:1 http://security.ubuntu.com/ubuntu noble-security InRelease
Hit:2 http://archive.ubuntu.com/ubuntu noble InRelease
Hit:3 http://archive.ubuntu.com/ubuntu noble-updates InRelease
Hit:4 http://archive.ubuntu.com/ubuntu noble-backports InRelease
Reading package lists... Done
Building dependency tree... Done
Reading state information... Done
129 packages can be upgraded. Run 'apt list --upgradable' to see them.
#Step 2. Download and run the Webmin setup
There are different ways to install Webmin. The most straightforward method is using an automated script to download and configure Webmin’s GPG key and repository.
This is achieved using two simple steps. First, download the setup script using the curl command:
$ curl -o webmin-setup-repo.sh https://raw.githubusercontent.com/webmin/webmin/master/webmin-setup-repo.sh
The download will display the following output.
Output  % Total    % Received % Xferd  Average Speed   Time    Time     Time  Current
                                 Dload  Upload   Total   Spent    Left  Speed
100 16246  100 16246    0     0   111k      0 --:--:-- --:--:-- --:--:--  111k
Once complete, you can verify the script download using the ls command:
ls -lh
The downloaded file should be listed.
Outputtotal 16K
-rw-r--r-- 1 root root 16K Mar  3 19:03 webmin-setup-repo.sh
Now run the installing script.
$ bash webmin-setup-repo.sh
The script automatically sets up the repository and installs GPG keys on your system. Additionally, it provides the Webmin package for installation.
OutputSetup Webmin releases repository? (y/N) y
  Downloading Webmin developers key ..
  .. done
  Installing Webmin developers key ..
  .. done
  Cleaning up package priority configuration ..
  .. done
  Setting up Webmin releases repository ..
  .. done
  Cleaning repository metadata ..
  .. done
  Downloading repository metadata ..
  .. done
Webmin and Usermin can be installed with:
  apt-get install --install-recommends webmin usermin
Finally, install Webmin using the following command:
sudo apt install webmin --install-recommends
The command installs Webmin along with all the required packages and dependencies.
#Step 3. Verify Webmin installation
Once installed, the Webmin service autostarts. You can confirm the status of the Webmin daemon by running:
sudo systemctl status webmin
The following output will be displayed, proof that Webmin is installed and running.
Output● webmin.service - Webmin server daemon
     Loaded: loaded (/usr/lib/systemd/system/webmin.service; enabled; preset: enabled)
     Active: active (running) since Mon 2025-03-03 19:41:14 EET; 1min 21s ago
   Main PID: 4542 (miniserv.pl)
      Tasks: 1 (limit: 2320)
     Memory: 81.5M (peak: 214.5M)
        CPU: 5.765s
     CGroup: /system.slice/webmin.service
By default, Webmin listens on port 10000 on localhost. To confirm this, invoke the ss command.
ss -antp | grep 10000
Here is the expected output.
OutputLISTEN 0      4096                  0.0.0.0:10000                 0.0.0.0:*     users:(("miniserv.pl",pid=4542,fd=5))
LISTEN 0      4096                     [::]:10000                    [::]:*     users:(("miniserv.pl",pid=4542,fd=6))
Having confirmed the successful installation of Webmin, let’s go ahead and access it.
#Step 4. Configure UFW for Webmin
If you already have UFW configured, allow inbound traffic to port 1000 as shown.
sudo ufw allow 10000/tcp
OutputRule added
Rule added (v6)
Next, reload the firewall for the changes to come into effect.
sudo ufw reload
OutputFirewall reloaded
#Step 5. Access and start using Webmin
To access Webmin, fire up your browser and head to the following URL.
https://server-ip:10000
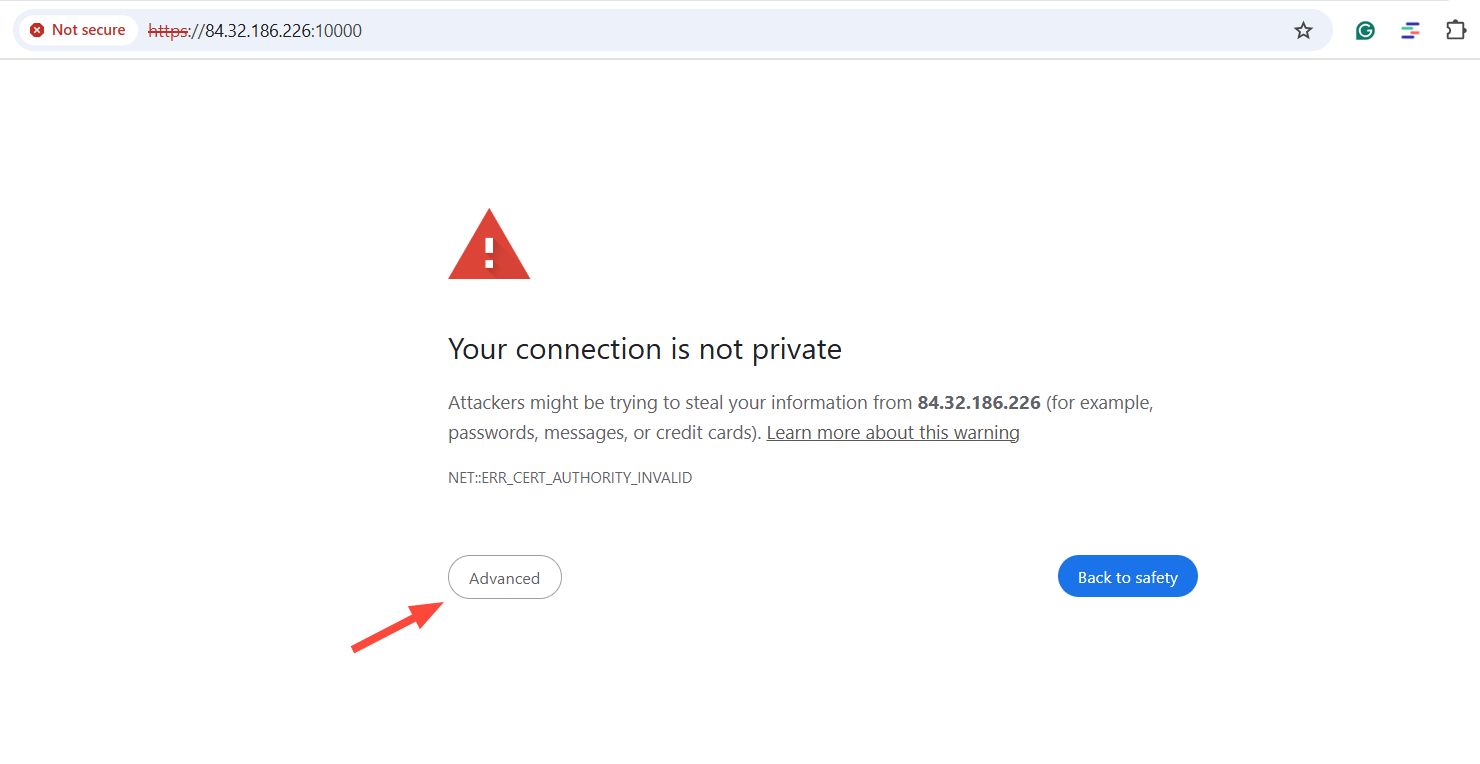
Webmin ships with a pre-configured self-signed SSL, which explains the warning notification on your browser about a potential attack. Do not be fazed. The browser flags the SSL certificate since it cannot associate it with a trusted CA. So proceed and click the Advanced tab.
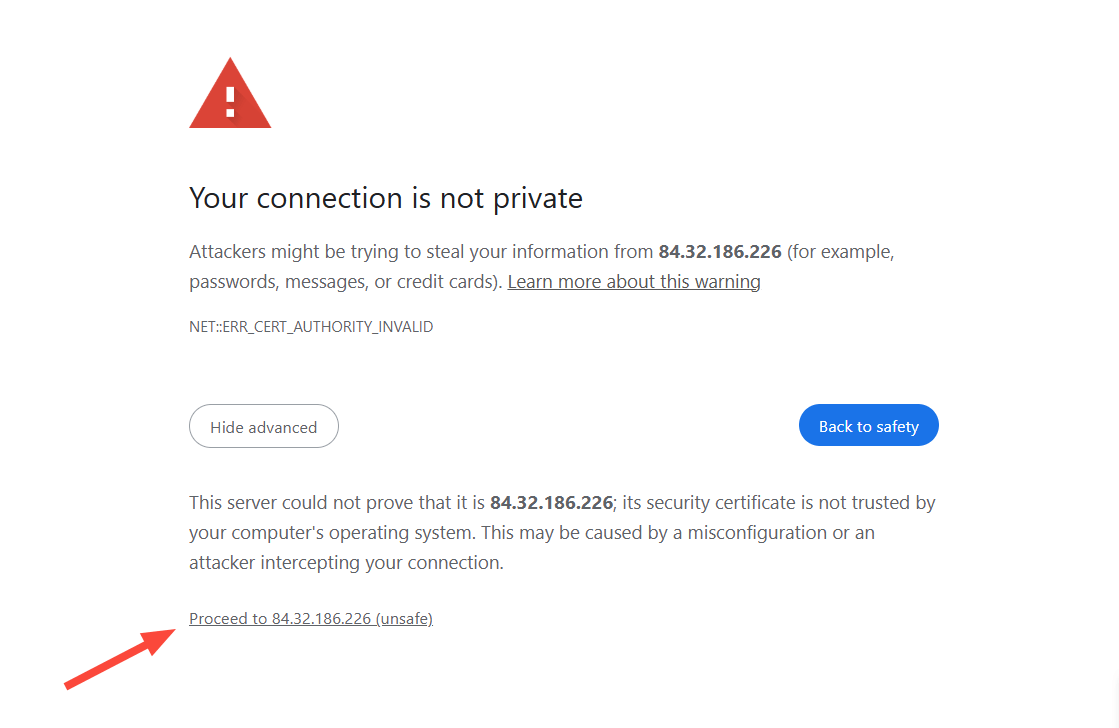
Next, click the link that lets you proceed to the URL provided.
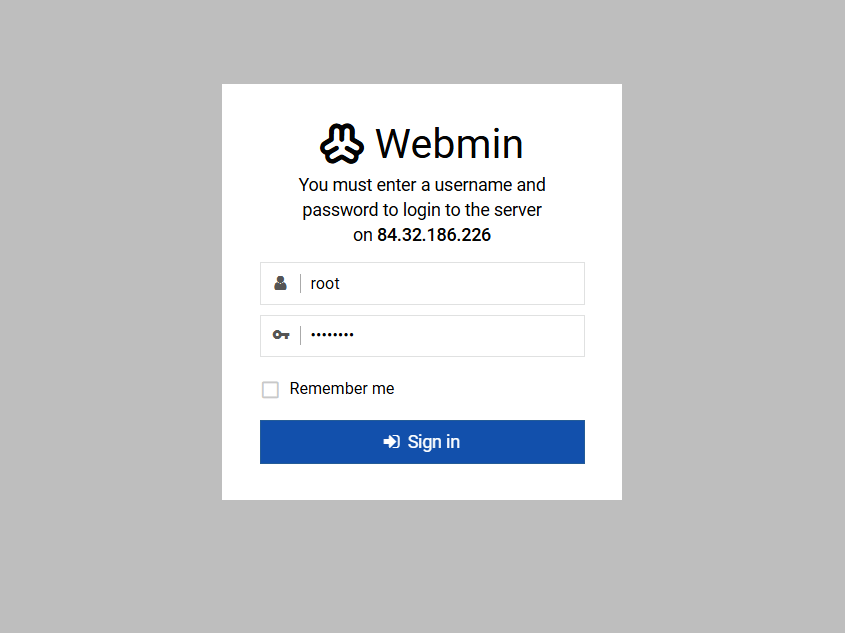
On the login screen, provide the login credentials and hit the Sign In button.
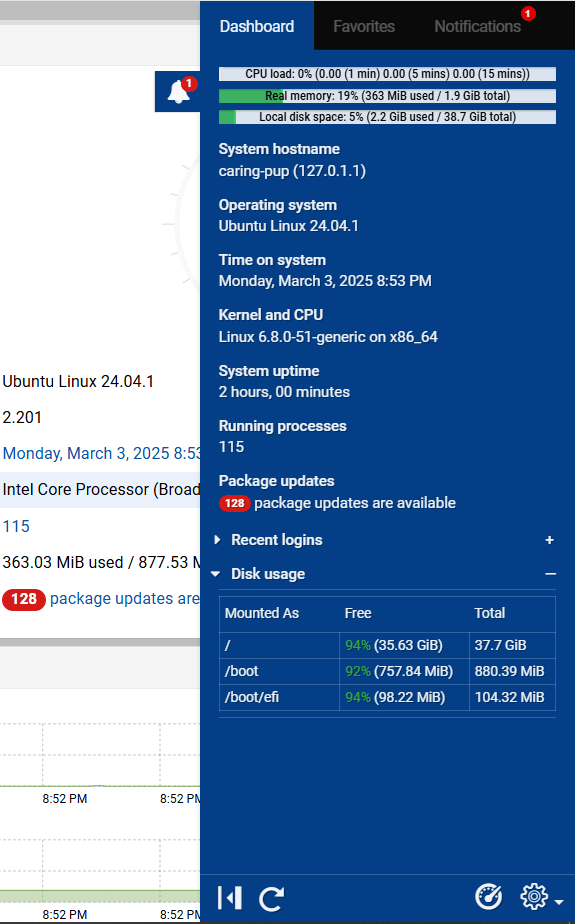
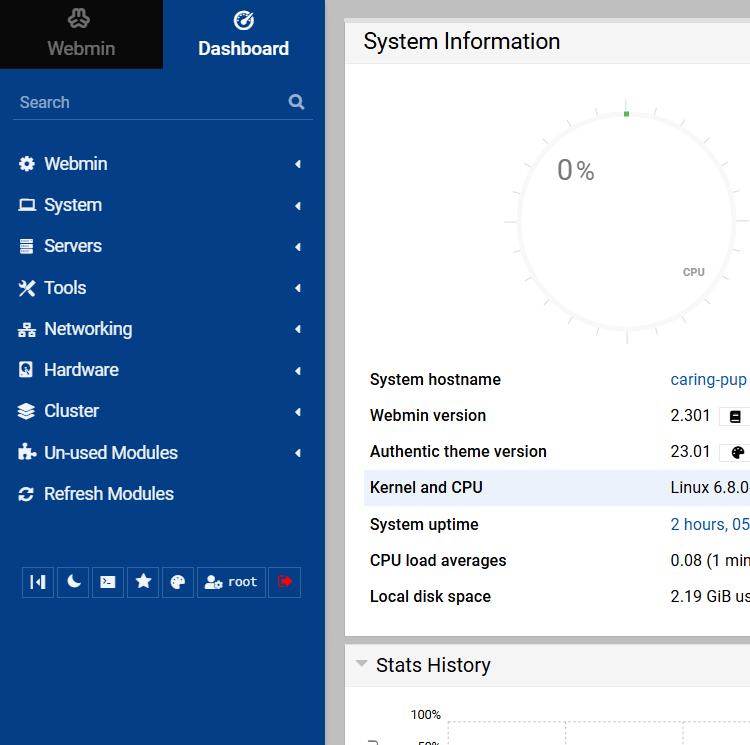
The Webmin dashboard will be displayed, offering a top-level view of your system’s metrics and information, such as hostname, uptime, operating system, pending software package updates, and much more.
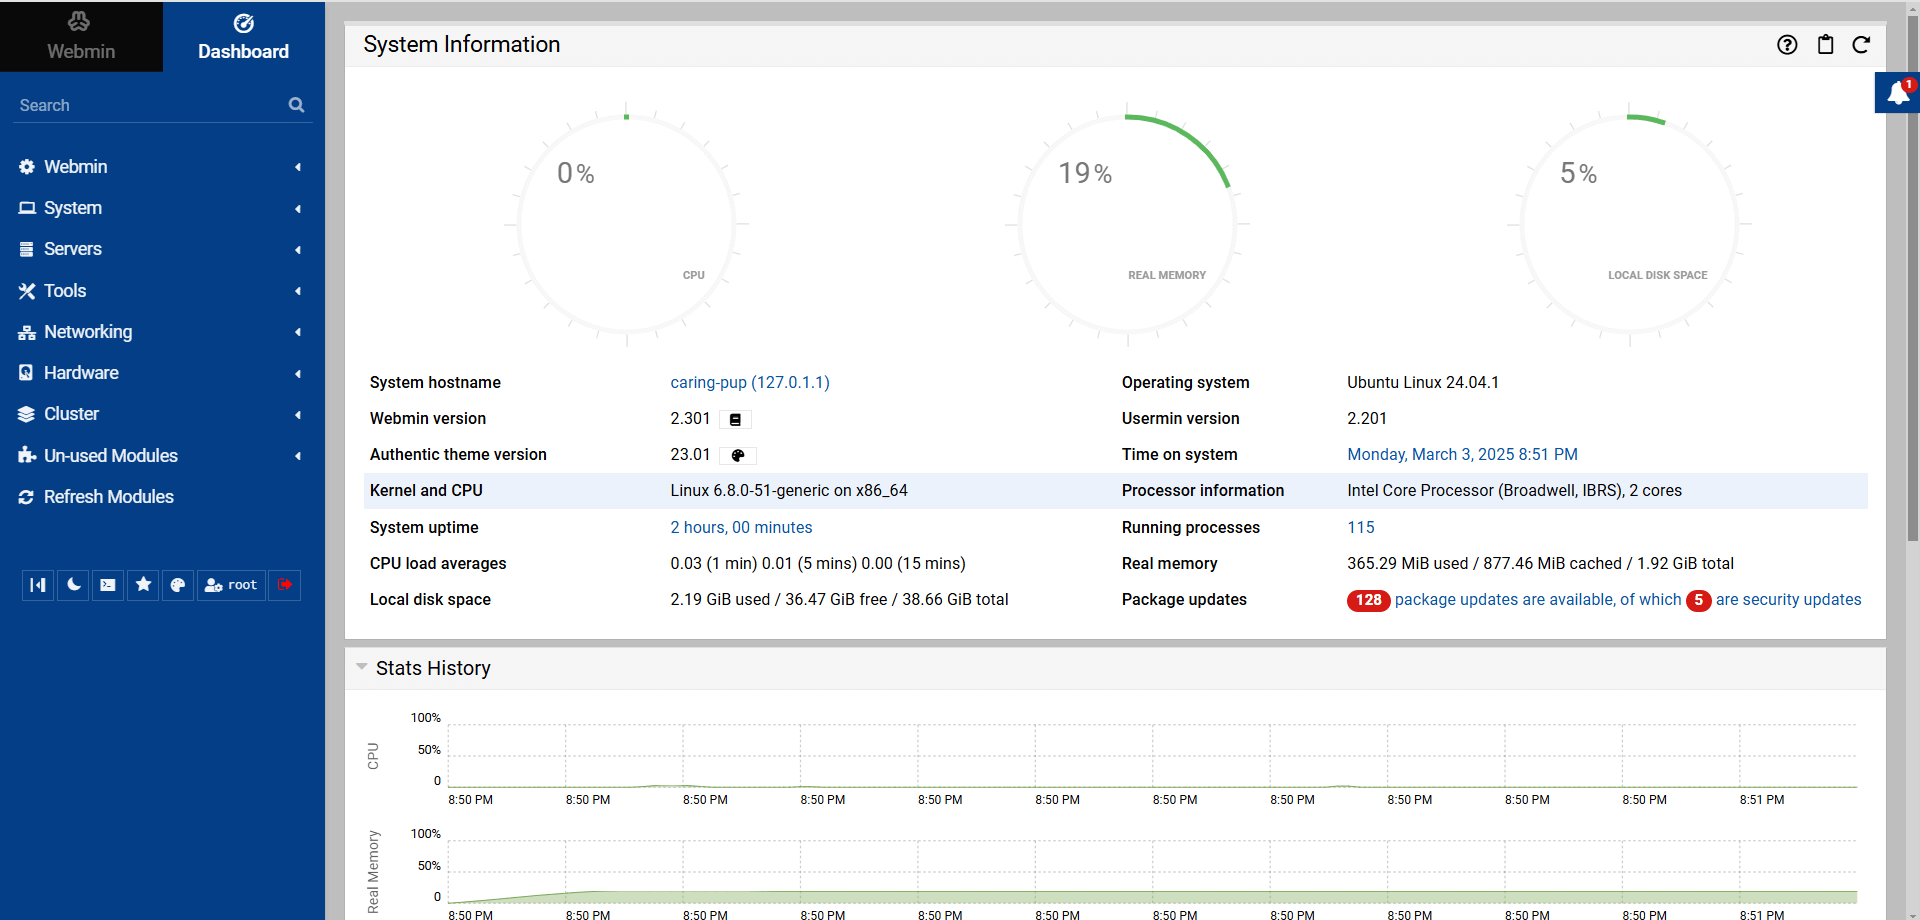
For more detailed resource usage, hit the notification bell as indicated.

This provides fine-grained information about system metrics such as CPU and memory usage.
Collapse the options on the navigation panel to catch a glimpse of the operations you can carry out.
#Conclusion
Webmin takes away the complexity of running commands on the terminal by offering a simple and intuitive UI for conveniently running system tasks. Check out the official documentation for more information.