How to Install Chrome on Ubuntu 24.04: Step-by-Step

The Google Chrome browser is arguably the most widely used web browser globally. Recent findings indicate that almost two-thirds of all internet users use Google Chrome for everyday internet browsing. The statistics are not surprising given its neat and easy-to-use UI coupled with a blend of handy features such as custom profiles, a password manager, support for browser extensions, and Google Translate for a smooth browsing experience.
Though not officially hosted on Ubuntu repositories, you can seamlessly install the Chrome browser by downloading the installation file from Google’s website and using it to install the browser. This can be accomplished in two main approaches:
Using the GUI ( Graphical User Interface )
From the CLI ( Command Line Interface )
Let’s have a look at each of these installation avenues.
#Prerequisites
For this article, ensure you have the following:
A graphical instance of Ubuntu 24.04.
A sudo user configured for installing Chrome on command-line
Deploy and scale your projects with Cherry Servers' cost-effective dedicated or virtual servers. Enjoy seamless scaling, pay-as-you-go pricing, and 24/7 expert support—all within a hassle-free cloud environment.
#Method 1: Install Google Chrome using the GUI
This is the most user-friendly and preferred approach to installing Google Chrome. It is especially recommended for novices and beginners unfamiliar with working from the command line.
#Step 1: Download the .DEB installation file
To get started, head to Google Chrome’s website and click the download link as shown below.
The site automatically detects that you are running a Debian Linux distribution and the first option will be set to download the .DEB file labeled 64-bit .deb ( For Debian/Ubuntu ). Just go ahead and click the Accept and install button to download the installation file.
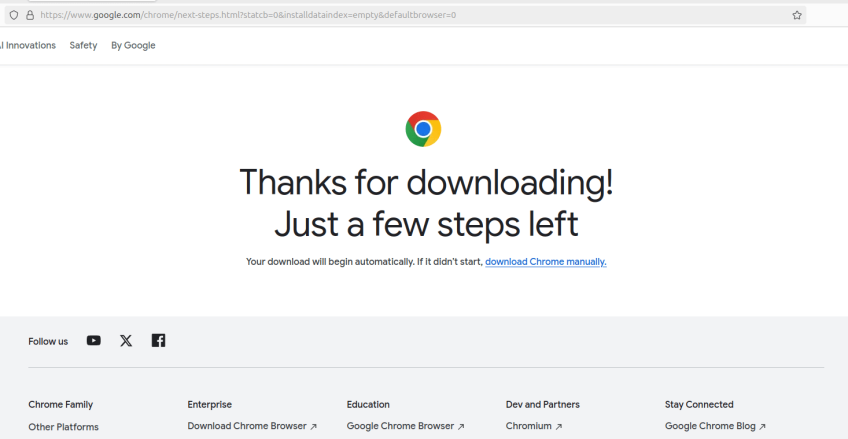
You will see a confirmation message on the browser showing that the download was successful. This should take a few seconds to conclude.
#Step 2: Install Gdebi Package Manager
Gdebi is a simple GUI tool for installing .deb files while handling dependencies. You need to ensure that Gdebi is installed. This will let you install Chrome from the downloaded .deb file. To proceed, access Ubuntu’s Software App. by clicking on its icon on the Dock.
Search for GDebi Package Installer in the search text field. Hit the Install button and authenticate using your account’s password. Once authenticated, Gdebi will be installed in a matter of minutes.
#Step 3: Install Chrome using Gdebi from .deb file
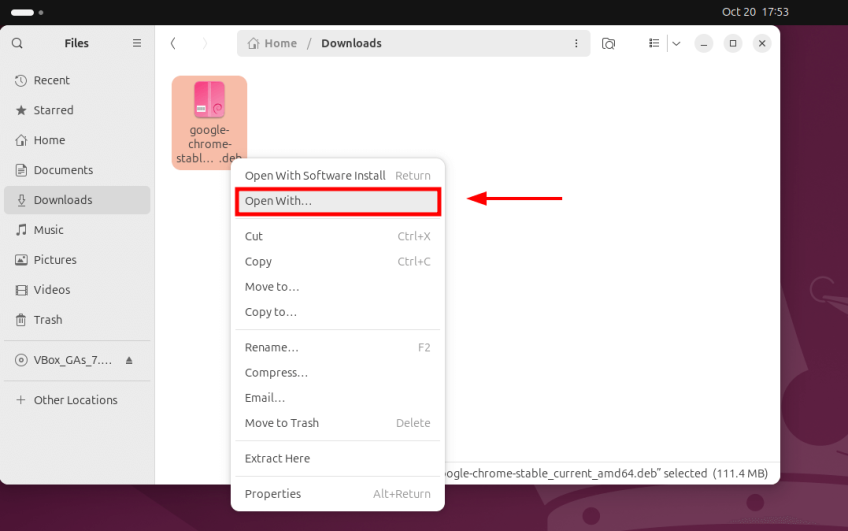
With Gdebi installed, you can install Chrome without a hurdle. Go to the Downloads directory containing the downloaded .deb file.
Right-click the file, and select the Open With option on the menu.
Next, select the GDebi Package Installer option and click the Open button.
The Gdebi GUI will be launched, displaying the package's name and the status of the dependencies required to install it. To install Chrome, click Install Package.
The installation will get underway as shown below.
 After a few seconds, the Chrome package will be successfully installed. Click the Close button to exit the pop-up notification and finally, close the GDebi GUI window.
#Step 4: Launch Google Chrome
At this point, Google Chrome is installed. To run it, press the Super or Windows logo key to launch the Application menu. Next, search for the Chrome browser and click the icon to launch it.
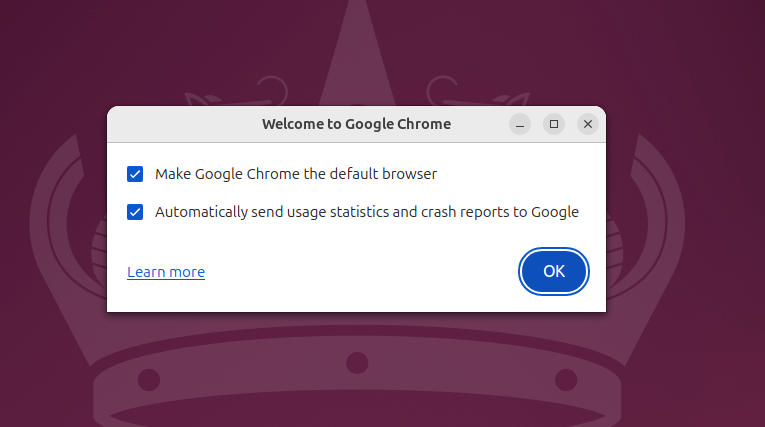
A pop-up window appears with default options that make Google Chrome the default browser and enable automatic sending of usage statistics and crash reports. You can choose to go with the default selections or uncheck them. Then click OK.
Finally, the browser will appear. Click the Sign In to start your browsing journey.
#Method 2: Install Google Chrome from the CLI
Installation of Google Chrome on the command line interface is the shorter installation method and is recommended for users proficient with working on the terminal. To start, follow the outlined steps.
First, download Google Chrome’s installation package.
wget https://dl.google.com/linux/direct/google-chrome-stable_current_amd64.deb
Next, use the dpkg package manager to install Google Chrome from the.DEB file.
sudo dpkg -i google-chrome-stable_current_amd64.deb
Chrome should be installed in a matter of a few seconds. From here, use the application menu to search and launch the browser.
#How to update Google Chrome
The installation of Chrome automatically adds a new file to the /etc/apt/sources.list.d directory labeled google-chrome.list. The file contains the repository entry for Google Chrome. To confirm this, run:
ls /etc/apt/sources.list.d
You can also display the contents of the Google Chrome repository.
cat /etc/apt/sources.list.d/google-chrome.list
 Therefore, to update Google Chrome, update the local package lists first. This updates the software repository definitions in the
 /etc/apt/sources.list/ file and /etc/apt/sources.list.d/ directory.
sudo apt update
Then upgrade Google Chrome to its latest version.
sudo apt --only-upgrade install google-chrome-stable
#How to uninstall Google Chrome
If you no longer wish to use Google Chrome and prefer another browser, you can easily remove it by running the command:
sudo apt remove google-chrome-stable
To uninstall Google Chrome, including its configuration files, and settings run:
sudo apt purge google-chrome-stable
#Conclusion
This tutorial taught you how to install Google Chrome on Ubuntu 24.04 LTS. In addition to this, you have seen how to upgrade and uninstall the browser. Google Chrome is a browser that continues to deliver a remarkable and exciting user experience while ensuring a safe browsing experience. Check out the main website for more information.
Cloud VPS Hosting
Starting at just $3.24 / month, get virtual servers with top-tier performance.


