How to Run an Ethereum Node | Step-by-Step


Setting up an Ethereum node can feel overwhelming, especially if you're unsure where to begin. Maybe you want more control over your transactions or are just curious about how the Ethereum network works behind the scenes, this guide will walk you through everything you need to know to get your Ethereum node up and running.
By the end of this guide, you'll have an Ethereum node running, with Geth as your execution client and Prysm as your consensus client. Steps for configuring a validator client are also included.
#Prerequisites
To follow this guide, ensure you have the following:
-
Some knowledge of Ethereum
-
Basic knowledge of the Linux command line
-
An Ubuntu server (This tutorial uses Ubuntu 22.04 LTS):
-
CPU with 4+ cores
-
16GB+ memory (RAM)
-
2TB SSD storage
-
-
Internet connection speed of 25+ MB/s
#Understanding Ethereum Nodes
Before getting into the steps involved in running an Ethereum node, you must understand what an Ethereum node is. In this section, you'll go through what an Ethereum node is and the different types.
#What is an Ethereum node?
An Ethereum node is software (or a device running this software) that downloads and maintains a copy of the Ethereum blockchain. It verifies the validity of each block, keeps its copy up to date with new blocks and transactions, and helps other nodes synchronize their copies of the blockchain.
There are three main types of Ethereum nodes:
Full nodes store the entire Ethereum blockchain, while light nodes rely on others to provide them with blockchain data.
There are different types of nodes, each serving a unique purpose:
-
Full Nodes: These nodes store the entire history of the Ethereum blockchain and check every transaction. They provide the highest level of security and decentralization.
-
Light Nodes: Light nodes store only a small part of the blockchain and rely on full nodes for the data they need making them faster and easier to run. They are more resource-efficient and suitable for devices with limited storage.
-
Archive Nodes: These nodes are full nodes that also keep a historical archive of every state of the blockchain, allowing them to reconstruct any past state. They’re mainly used for looking up old data.
Running an Ethereum node means contributing to the security, decentralization, and overall health of the Ethereum network by ensuring that transactions are validated and that the blockchain remains consistent across all participants.
#How to run an Ethereum node
After the merge, running an Ethereum node involves two main components: an execution client and a consensus client which need to be run together. The execution client (like Geth) processes transactions and smart contracts, while the consensus client (like Prysm) manages the proof-of-stake consensus process. The two clients communicate using a shared secret to keep the node synchronized with the Ethereum network, helping to secure and maintain the blockchain.
There are several execution and consensus clients available for running an Ethereum node, each with its own features and strengths. However, in this tutorial, we’ll be using Geth as the execution client and Prysm as the consensus client
#Step 1: Create a server
Get a server up and running either locally or from a cloud provider. A dedicated server from Cherry Servers was used here.
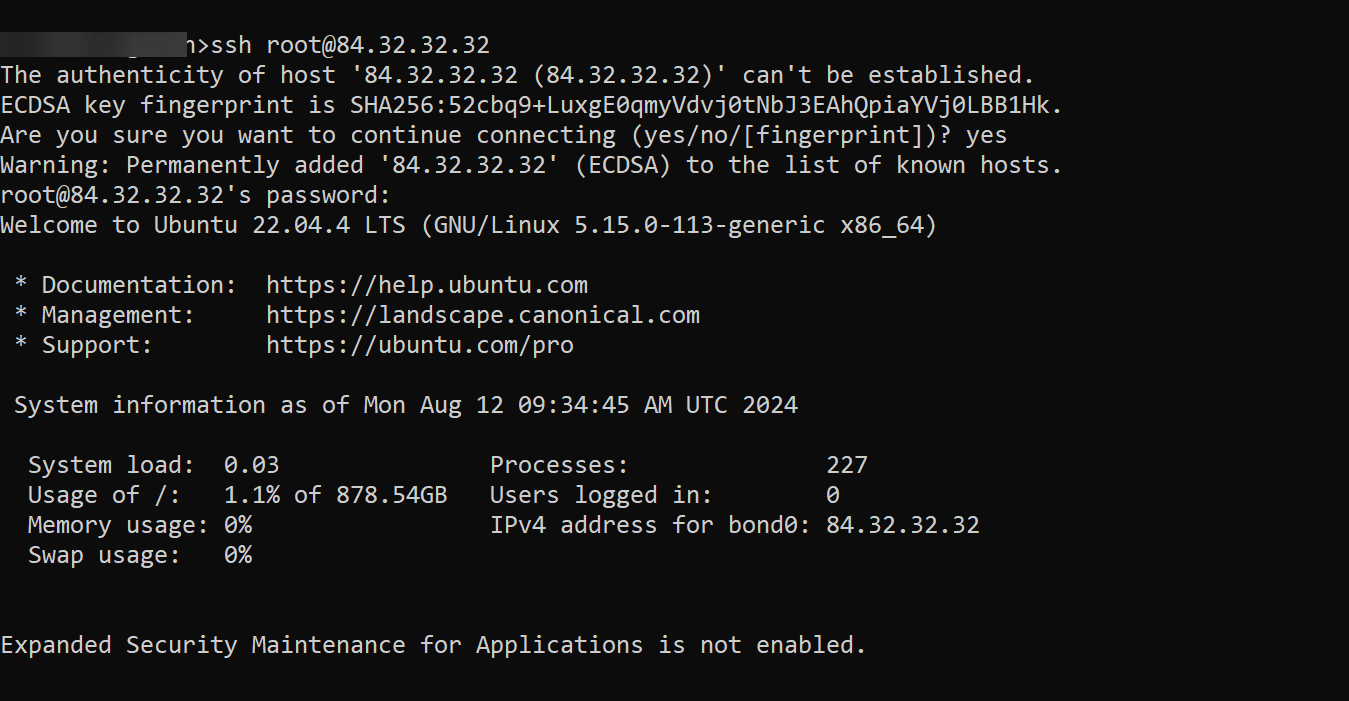
#Step 2: Connect to the server
Next, you want to connect to the server via SSH. You can do this using the following format:
ssh user@server-ip
#Step 3: Update system packages
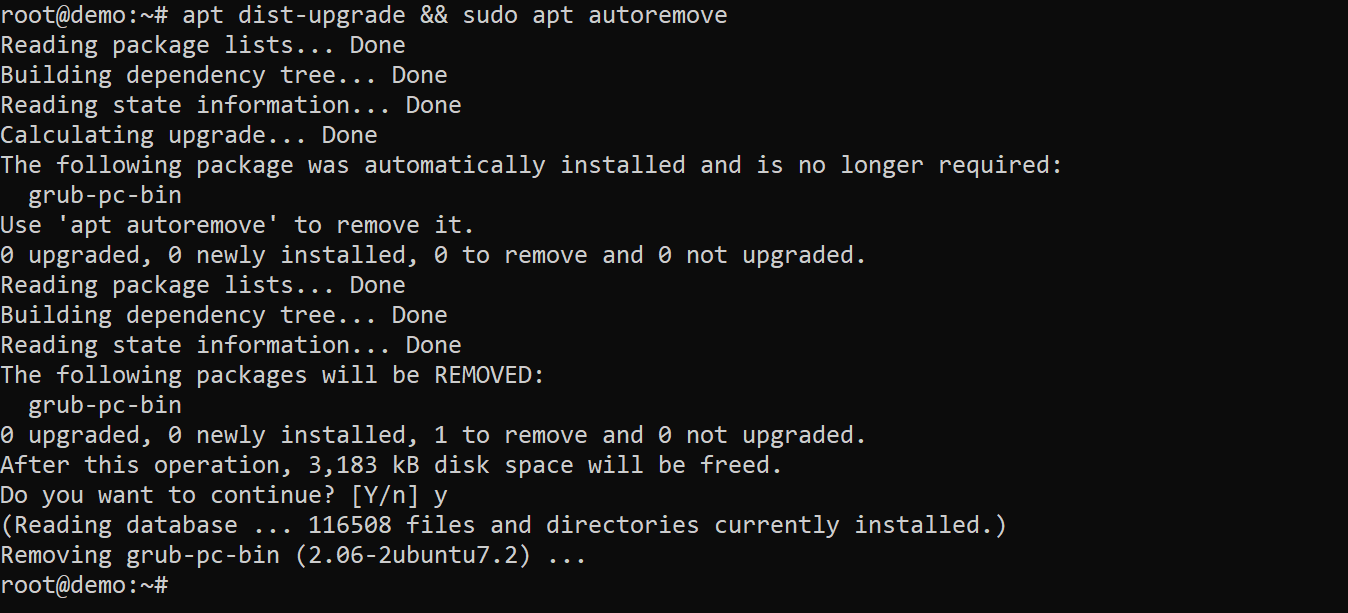
After connecting to the server, you want to ensure that the system is up-to-date and secure. Run the following commands to update the system packages upgrade any existing packages, and remove those that are no longer needed:
apt -y update && apt -y upgrade
apt dist-upgrade && sudo apt autoremove

Next, restart the system to apply any updates that require a reboot:
reboot
#Step 4: Create a non-root user
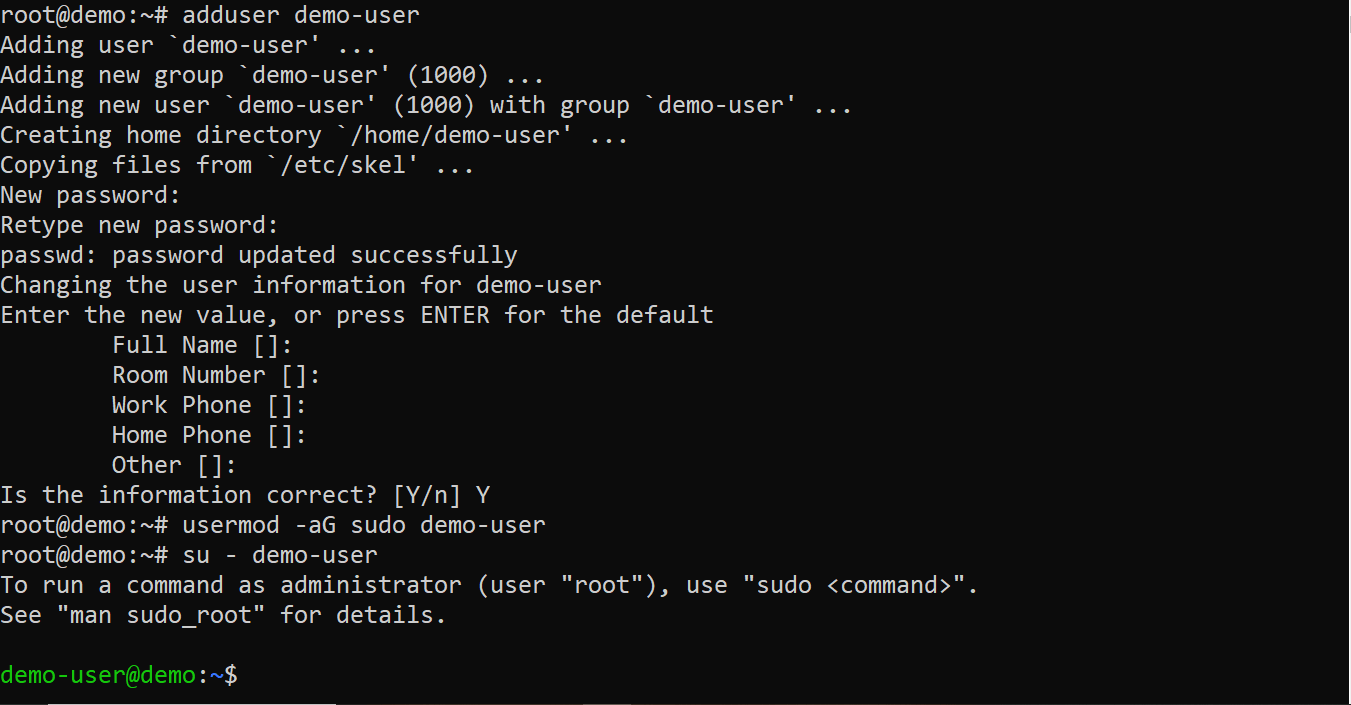
To reduce the risk of accidental changes, it's safer to avoid using the root user. Instead, create a new user with sudo privileges.
Reconnect to the server via SSH, then create a non-root user with sudo privileges and switch to the new user by running the following commands:
adduser demo-user
usermod -aG sudo demo-user
su - demo-user
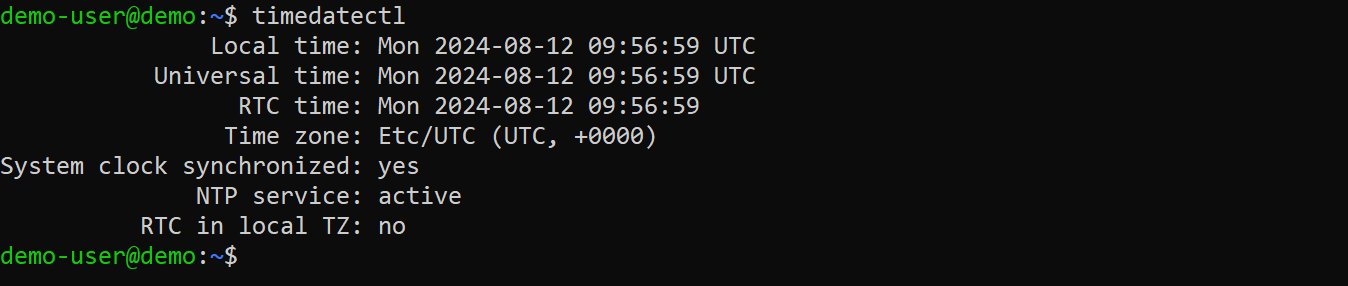
#Step 5: Verify system time
Next, confirm that the time and timezone are accurate and that the system clock is synchronized. This is important for logging and network operations.
timedatectl
#Step 6: Configure the firewall
To ensure your Ethereum node can communicate with the network while staying secure, you need to configure the firewall to allow specific ports. In this step, you'll open the ports needed by Geth and Prysm, and enable the firewall on your server:
sudo ufw allow 30303/tcp
sudo ufw allow 30303/udp
sudo ufw allow 12000/udp
sudo ufw allow 13000/tcp
sudo ufw allow 22/tcp
sudo ufw enable
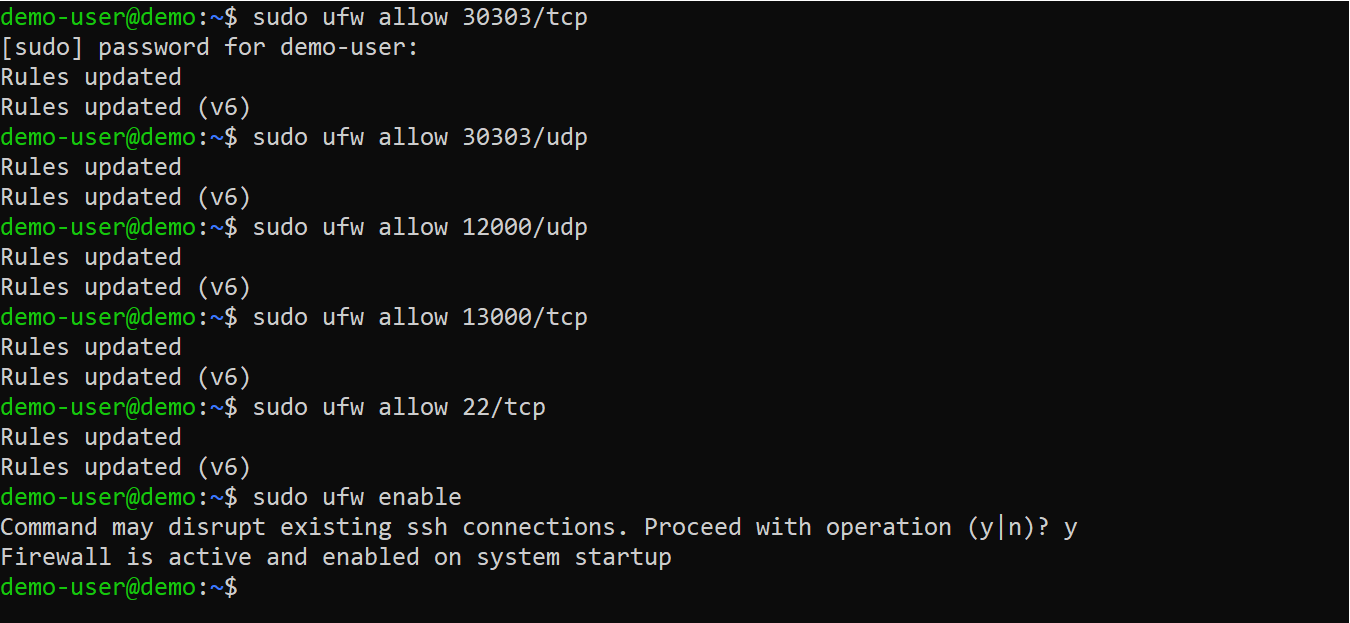
The execution client (Geth) uses port 30303 for its peer-to-peer connections. Ports 12000 and 13000 are used for Prysm's beacon chain discovery and communication.
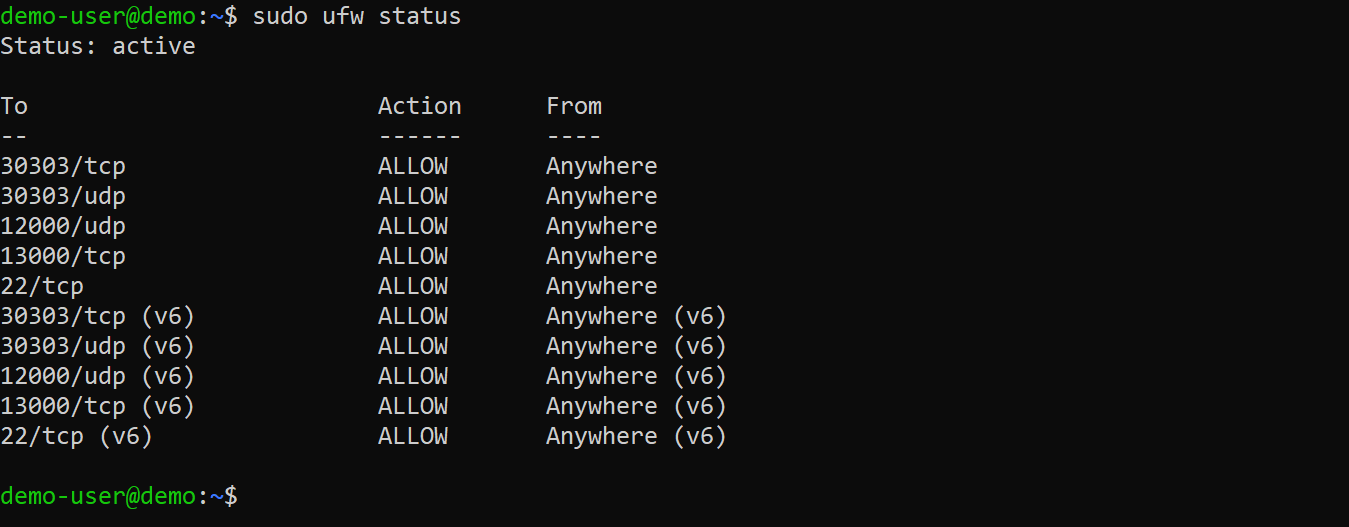
Finally, confirm the status of your firewall:
sudo ufw status
#Step 7: Generate authentication secret
For Geth (the execution client) and Prysm (the consensus client) to communicate securely, they need a shared secret, known as a JSON Web Token (JWT). This token ensures that only authorized clients can interact with each other.
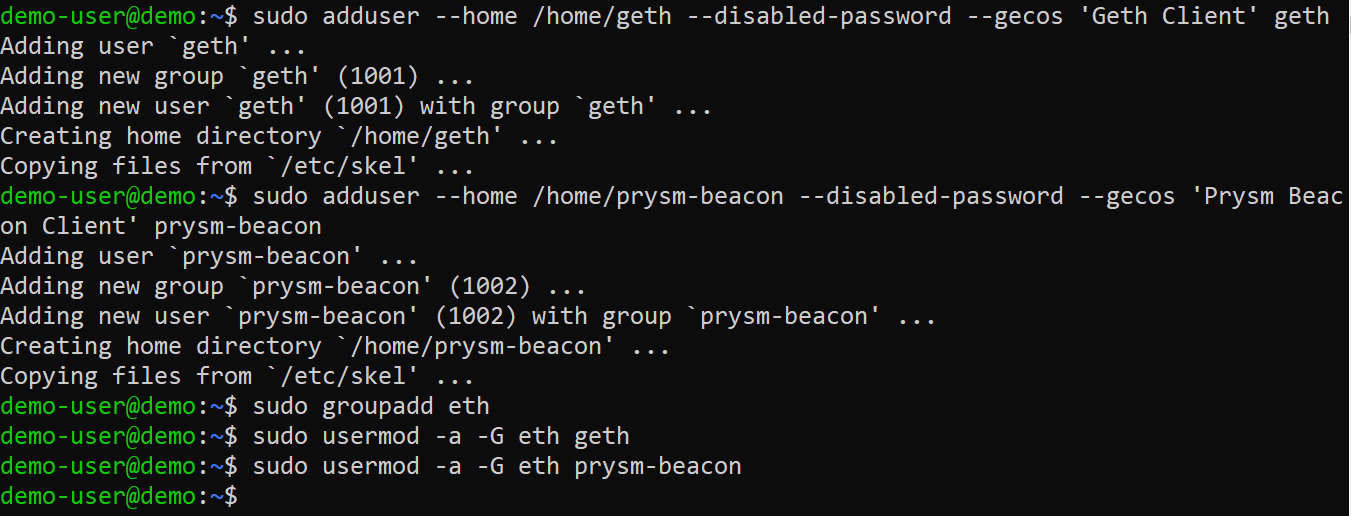
Before generating the secret, it's a good practice to create dedicated users for each client. This minimizes the risk of one client affecting the other and isolates their files and processes.
Start by creating the users and assigning them to a common group:
sudo adduser --home /home/geth --disabled-password --gecos 'Geth Client' geth
sudo adduser --home /home/prysm-beacon --disabled-password --gecos 'Prysm Beacon Client' prysm-beacon
sudo groupadd eth
sudo usermod -a -G eth geth
sudo usermod -a -G eth prysm-beacon
Next, create a directory to store the JWT secret, set the necessary permissions, and generate the secret:
sudo mkdir -p /var/lib/secrets
sudo chgrp -R eth /var/lib/ /var/lib/secrets
sudo chmod 750 /var/lib/ /var/lib/secrets
sudo openssl rand -hex 32 | tr -d '\n' | sudo tee /var/lib/secrets/jwt.hex > /dev/null

Then set permissions on the secret file so that only the root user and the clients' users have access to it:
sudo chown root:eth /var/lib/secrets/jwt.hex
sudo chmod 640 /var/lib/secrets/jwt.hex

#Step 8: Create data directories
To keep the data for each client organized, you need to create dedicated directories where Geth and Prysm will store their data.
Run the following commands to create the data directories for each client:
sudo -u geth mkdir /home/geth/geth
sudo -u prysm-beacon mkdir /home/prysm-beacon/beacon

These directories will be used by Geth and Prysm to store blockchain data, logs, and other necessary files.
#Step 9: Install and configure execution client (Geth)
In this step, you'll install Geth, the execution client, and configure it to run as a service on your server. This ensures that Geth starts automatically when you boot your server and will continue to run as long as the server is on.
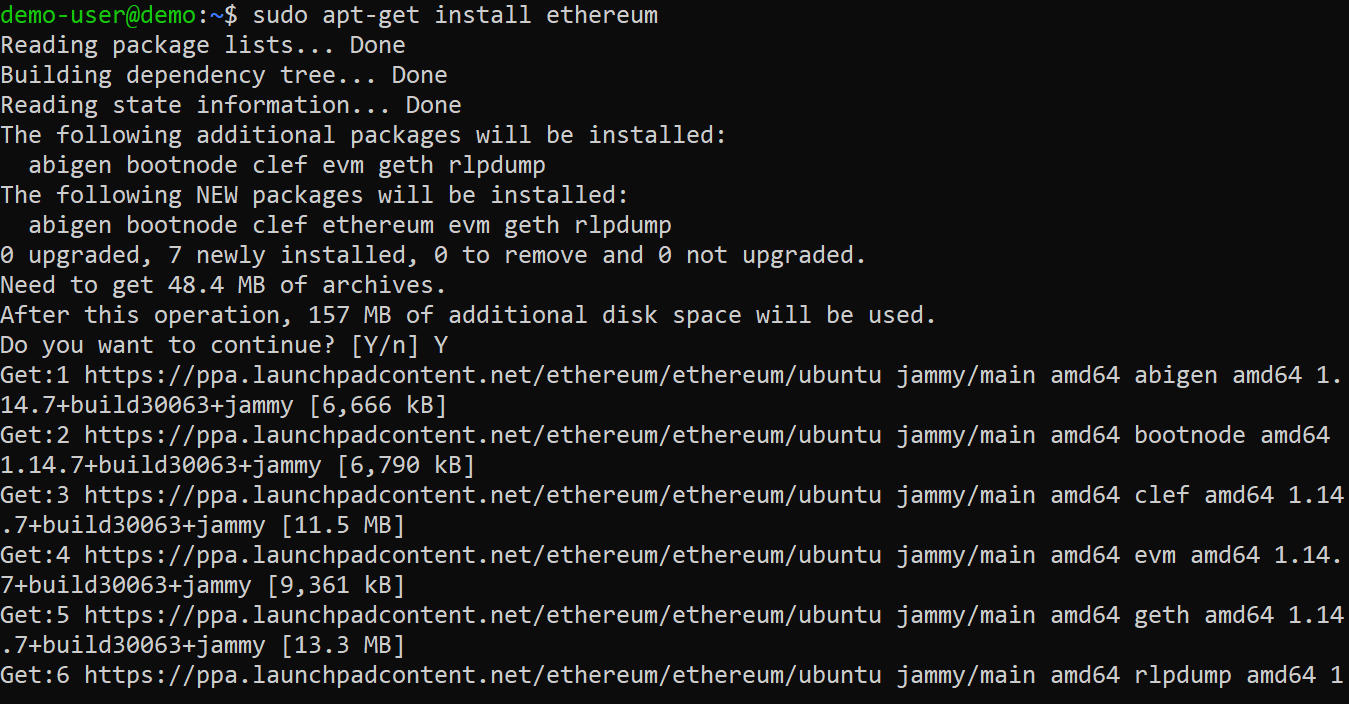
Add the Ethereum PPA and Install Geth:
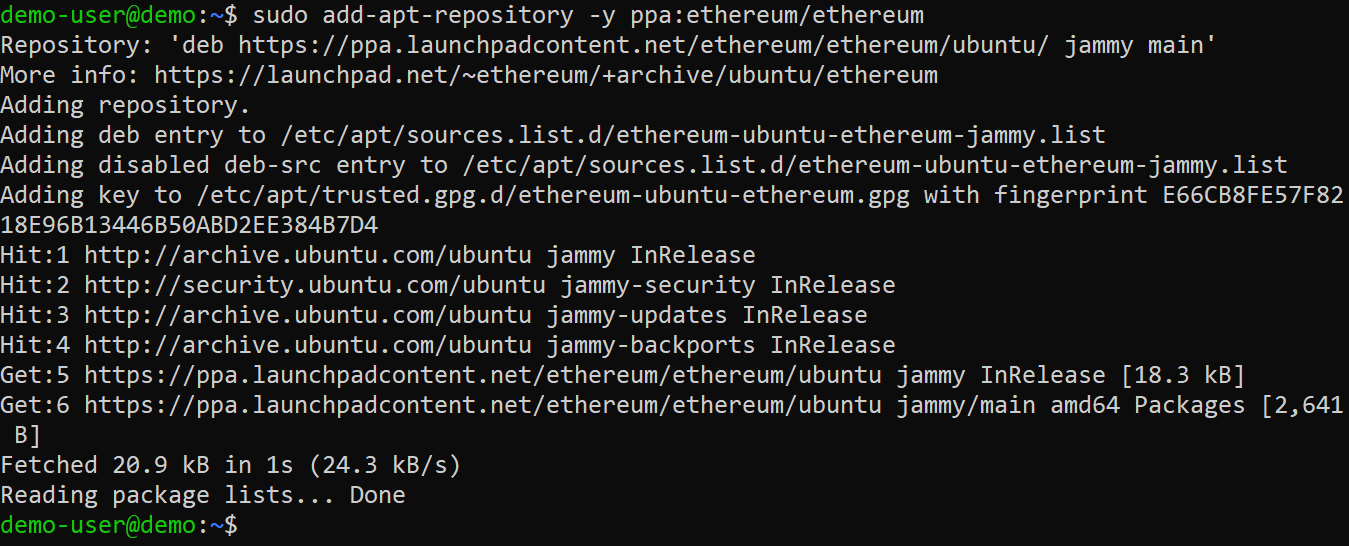
Start by adding the Ethereum PPA (Personal Package Archive) to your system's repositories and installing Geth:
sudo add-apt-repository -y ppa:ethereum/ethereum
sudo apt-get update
sudo apt-get install ethereum

Create a Systemd Service for Geth:
To manage Geth as a background service, you'll create a systemd service file. This file defines how Geth should be started, stopped, and restarted.
Open the service file in a text editor:
sudo nano /etc/systemd/system/geth.service
Add the following configuration to the file:
[Unit]

Description=Geth Full Node
After=network-online.target
Wants=network-online.target

[Service]

Type=simple
Restart=always
RestartSec=5s
User=geth
WorkingDirectory=/home/geth
ExecStart=/usr/bin/geth \
  --http \
  --http.api eth,net,engine,admin \
  --mainnet \
  --datadir /home/geth/geth \
  --authrpc.jwtsecret /var/lib/secrets/jwt.hex

[Install]
WantedBy=multi-user.target
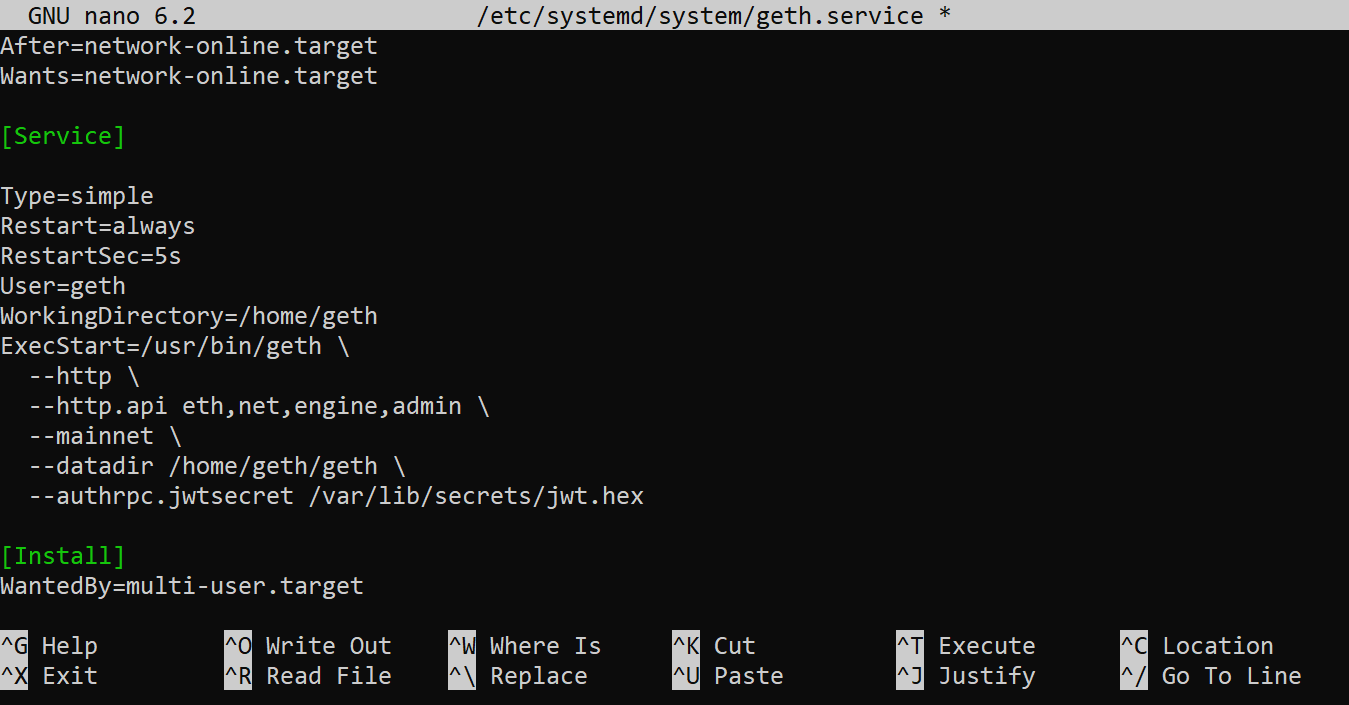
This configuration specifies that Geth should run as the geth user, use the data directory you created earlier and authenticate its RPC (Remote Procedure Call) communications using the JWT secret.
Start and Enable the Geth Service:
After saving the service file, reload the systemd daemon to apply the changes, start the Geth service, and enable it to start on boot:
sudo systemctl daemon-reload
sudo systemctl start geth
sudo systemctl enable geth

Check the Status of the Geth Service:
Verify that Geth is active running correctly by checking its status:
sudo systemctl status geth
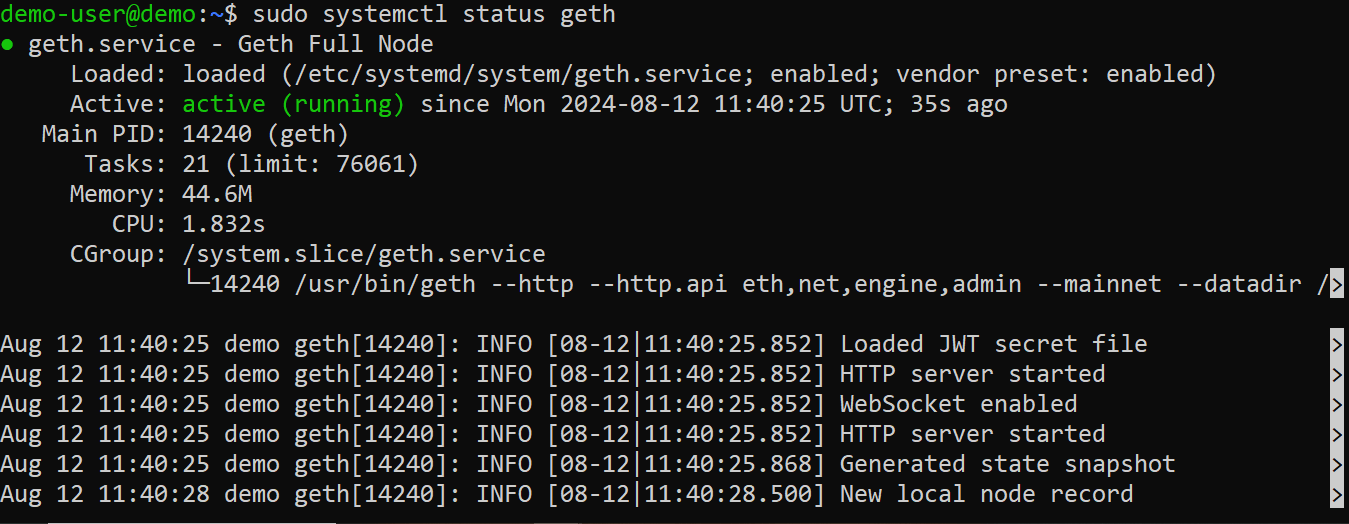
You can quit with Ctrl + C; this won't affect the running service.
To view the logs, run the command:
sudo journalctl -fu geth
When you run the command to check the logs, you may see a message: "Post-merge network, but no beacon client seen. Please launch one to follow the chain!"
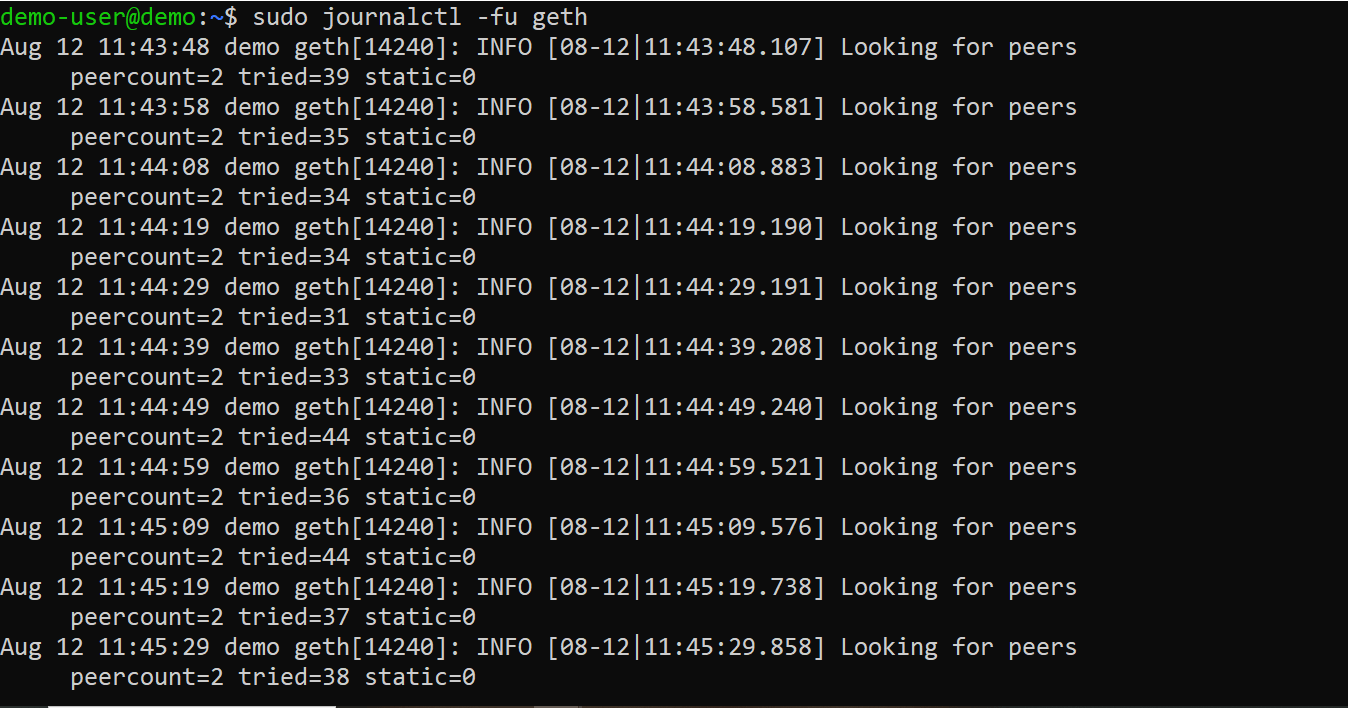
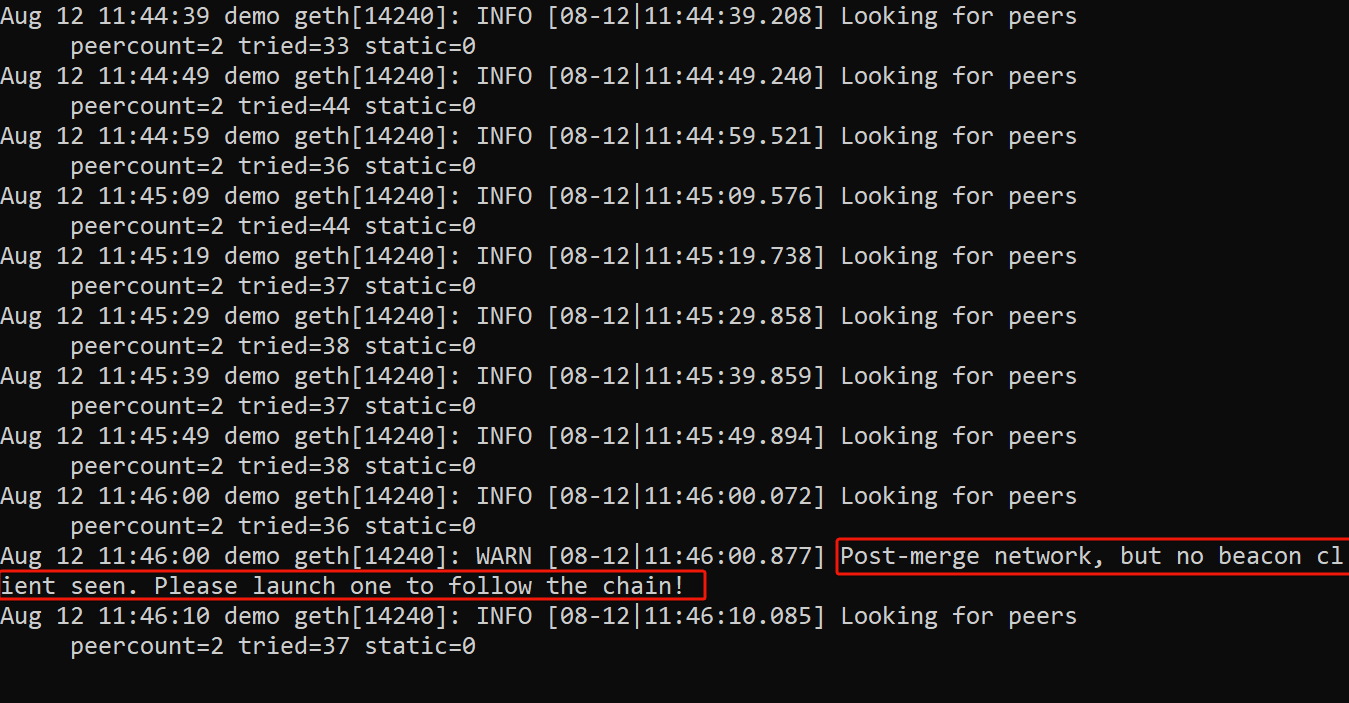
You're seeing this message because the execution client requires a connected consensus client to follow the chain after the merge. This message indicates that Geth hasn't detected a running consensus client yet.
To fix this, set up and launch the Prysm client (consensus client) as described in the next steps. Once Prysm is running and connected to Geth, the message will disappear.
#Step 10: Configure consensus client (Prysm)
Now that Geth is up and running, the next step is to set up the Prysm Beacon Chain client, which acts as the consensus client.
Download and Prepare the Prysm Script:
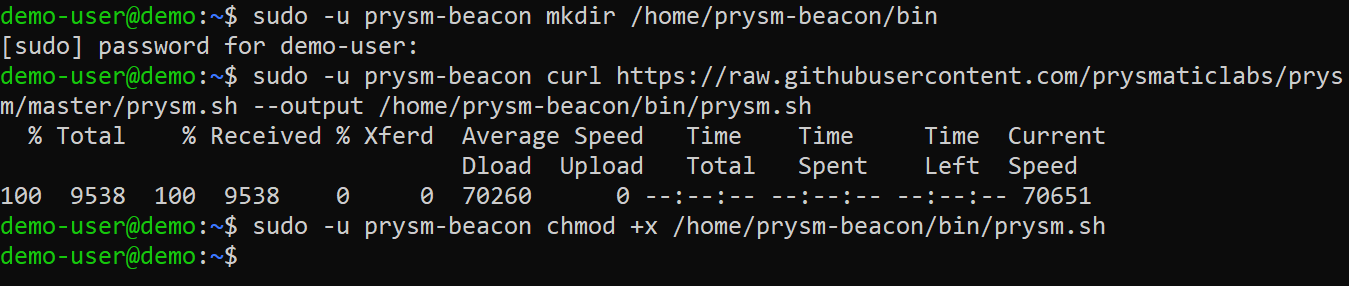
First, create a directory for the Prysm script, download it and make it executable:
sudo -u prysm-beacon mkdir /home/prysm-beacon/bin
sudo -u prysm-beacon curl https://raw.githubusercontent.com/prysmaticlabs/prysm/master/prysm.sh --output /home/prysm-beacon/bin/prysm.sh
sudo -u prysm-beacon chmod +x /home/prysm-beacon/bin/prysm.sh
This script will be used to run the Prysm Beacon Chain client.
Create a Systemd Service for Prysm:
Similar to how you configured Geth, you'll create a systemd service file for Prysm beacon client.
Open the service file in a text editor:
sudo nano /etc/systemd/system/prysm-beacon.service
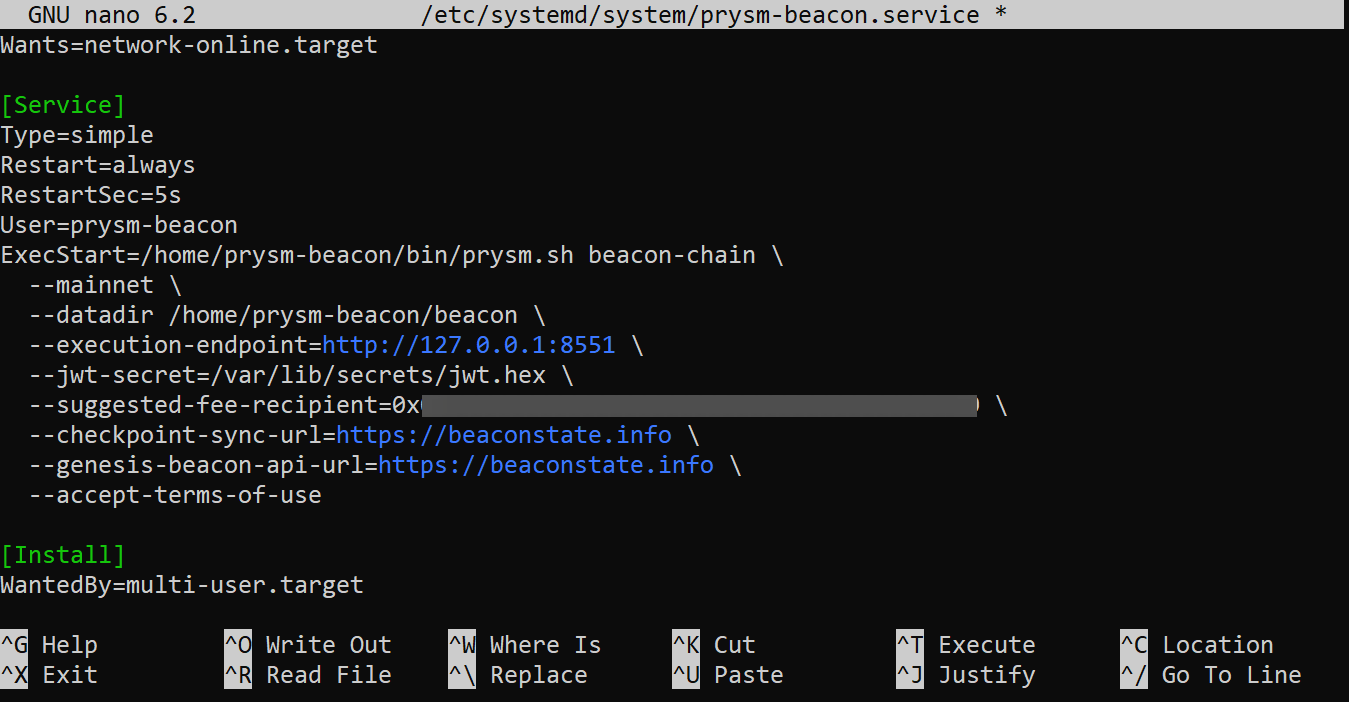
Add the following configuration to the file:
[Unit]

Description=Prysm Beacon Chain
After=network-online.target
Wants=network-online.target

[Service]
Type=simple
Restart=always
RestartSec=5s
User=prysm-beacon
ExecStart=/home/prysm-beacon/bin/prysm.sh beacon-chain \
  --mainnet \
  --datadir /home/prysm-beacon/beacon \
  --execution-endpoint=http://127.0.0.1:8551 \
  --jwt-secret=/var/lib/secrets/jwt.hex \
  --suggested-fee-recipient=YourWalletAddress \
  --checkpoint-sync-url=https://beaconstate.info \
  --genesis-beacon-api-url=https://beaconstate.info \
  --accept-terms-of-use

[Install]
WantedBy=multi-user.target
-
The
--execution-endpoint=http://127.0.0.1:8551flag points Prysm to the local Geth client. -
The
--jwt-secret=/var/lib/secrets/jwt.hexflag allows Prysm to authenticate its communication with Geth using the shared JWT secret. -
The
--suggested-fee-recipient=YourWalletAddressflag should be replaced with your Ethereum wallet address to receive potential rewards.
Start and Enable the Prysm Service:
After saving the service file, reload the systemd daemon to apply the changes, start the Prysm service, and enable it to start on boot:
sudo systemctl daemon-reload
sudo systemctl start prysm-beacon
sudo systemctl enable prysm-beacon

Check the Status of the Prysm Service:
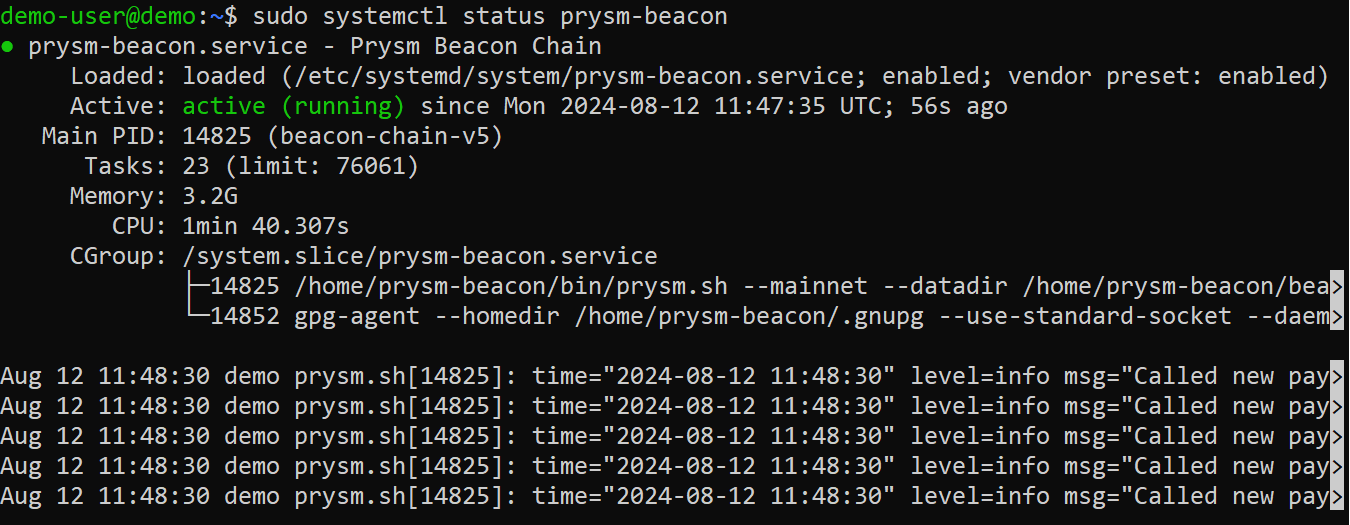
Verify that Prysm is running correctly by checking its status:
sudo systemctl status prysm-beacon
You can check the logs using:
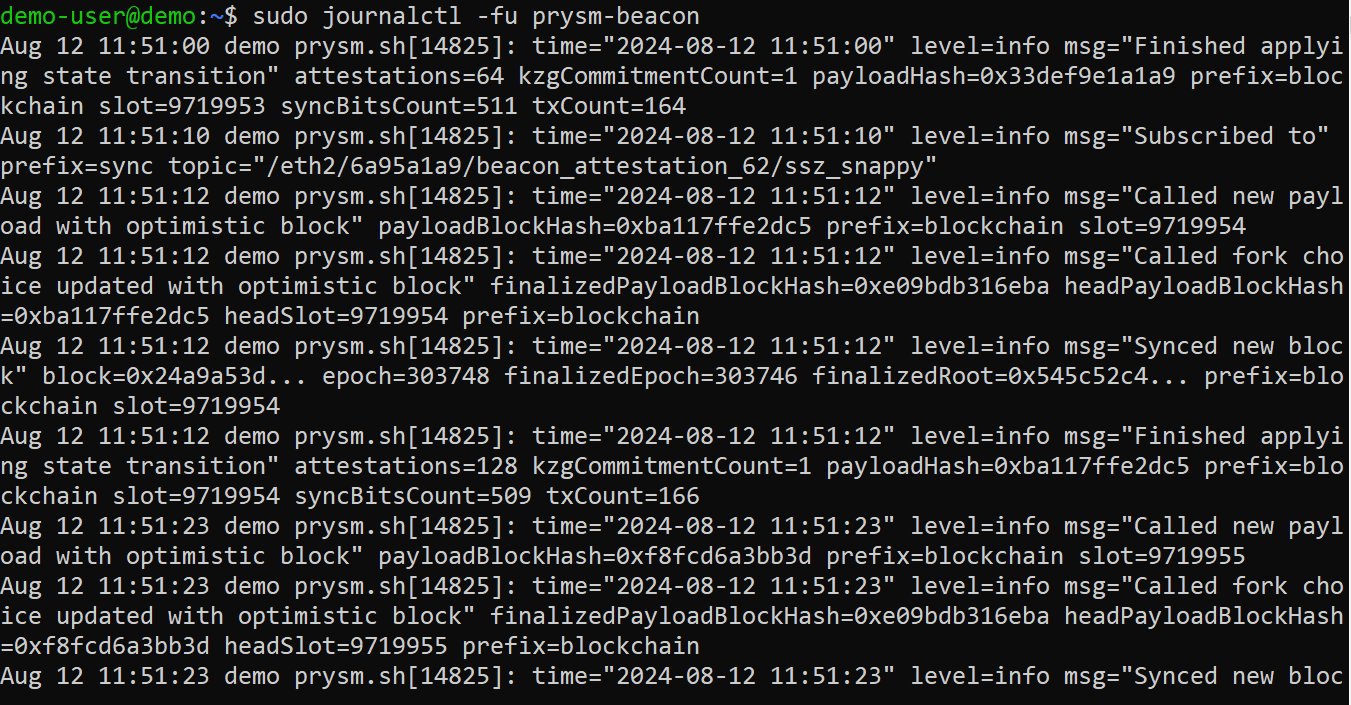
sudo journalctl -fu prysm-beacon
When you check the logs with sudo journalctl -fu prysm-beacon, you should see Prysm connecting to the Geth client and syncing with the Ethereum blockchain. If the earlier message from Geth indicated that no beacon client was found, this step should resolve that, as Prysm will now be connected.
Geth needs the Prysm beacon client synced to follow the chain correctly. Without it, Geth can't determine the correct head to sync to.
You can check the logs for the Geth service in another terminal to check its progress.
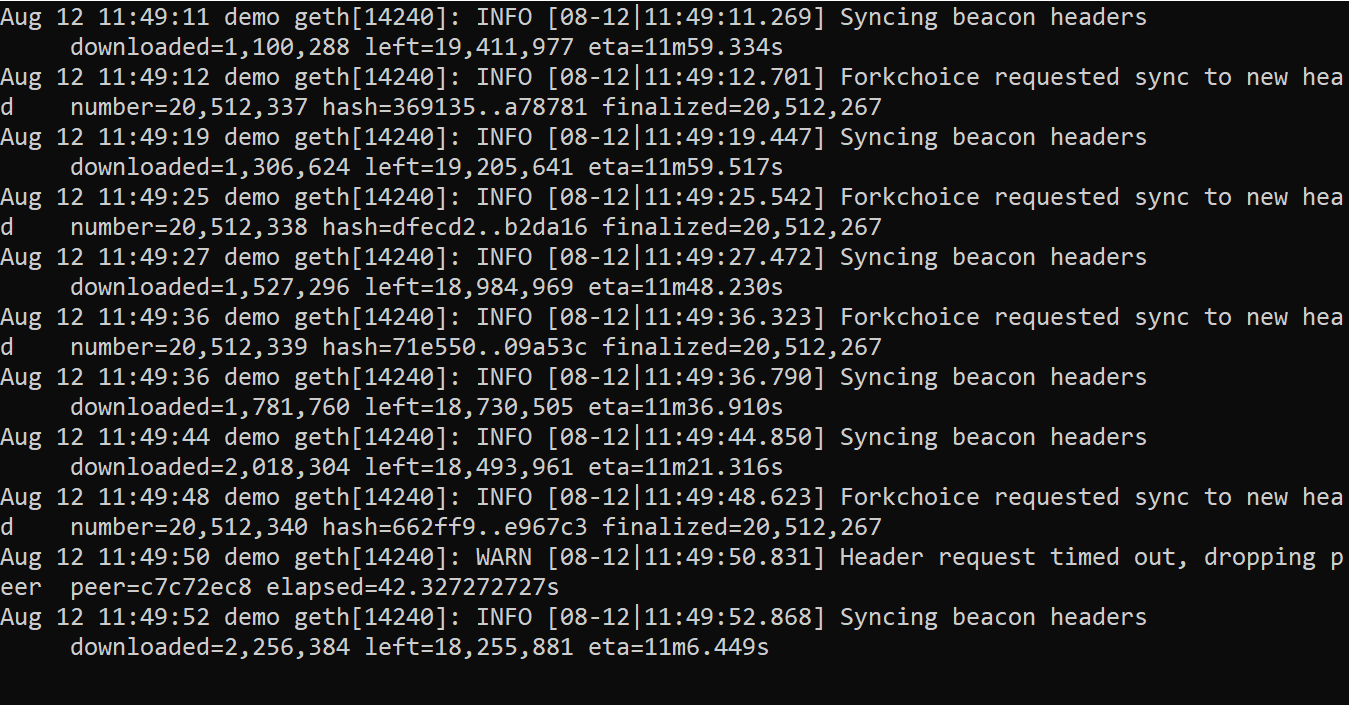
Syncing the execution client (Geth) can take a significant amount of time, ranging from several hours to days, depending on your internet speed and hardware. Once Geth and the Prysm beacon client are both up and running, you are running an Ethereum node. Ensure you regularly check the logs or monitor the clients to ensure they are operating as they should and synchronizing as expected.
#Configure validator node with Prysm
After setting up your Ethereum node, you might consider running a validator node. This helps secure the network and lets you earn rewards through the proof-of-stake mechanism.
Running a validator node involves:
-
Staking ETH: You need to stake at least 32 ETH to activate a validator, which acts as collateral to ensure honest behavior.
-
Constant Uptime: Your validator must be online and connected to the network continuously to avoid penalties.
-
Security: You are responsible for securing your keys and protecting your node from attacks.
Also read: How to become a Solana validator
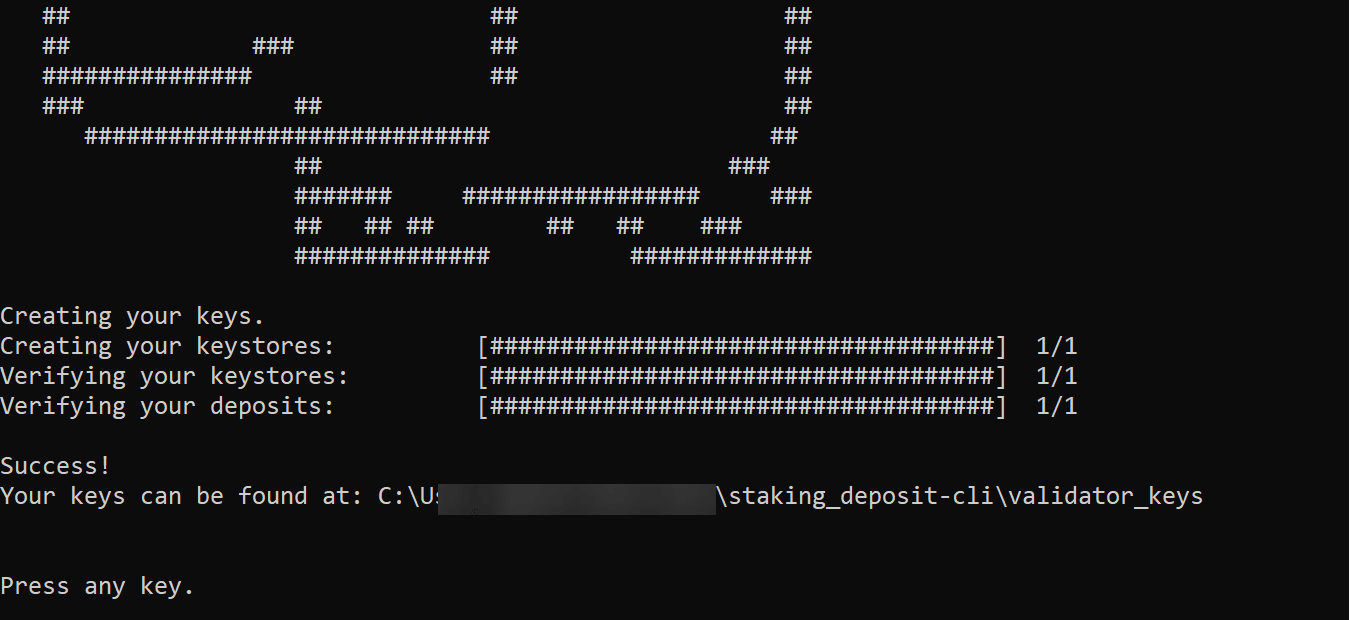
#Step 1: Create the validator keys
You'll first need to generate validator keys using the Ethereum Staking Deposit CLI. It's recommended to perform this step on an offline and secure device to keep your mnemonic phrase safe.
deposit.exe new-mnemonic --num_validators=NumberOfvalidators --chain=mainnet
Replace NumberOfvalidators with the actual number of validator keys you want to create.
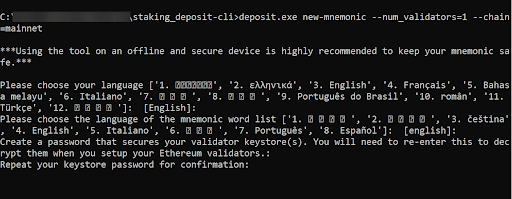
Input a password for decrypting your keys. After that, your seed phrase will be displayed, store this securely.
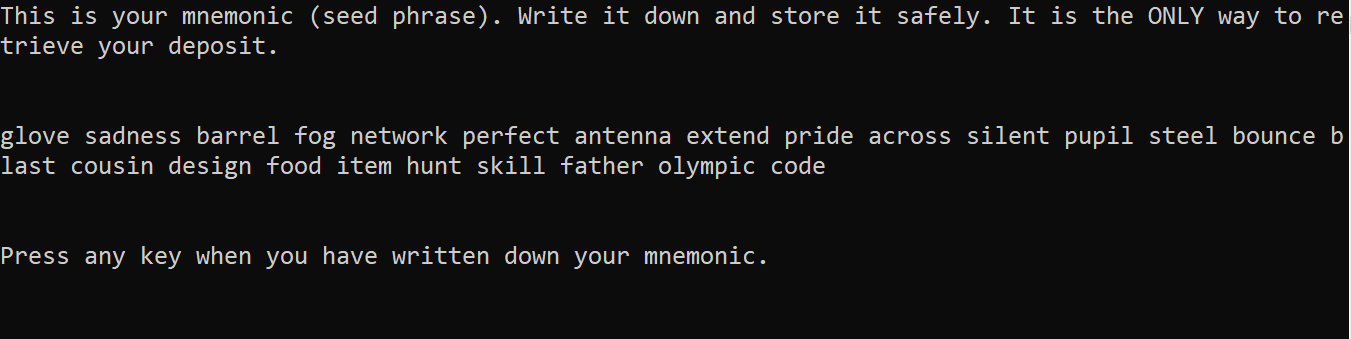
Once you've securely saved the mnemonic, press any key and your validator and deposit data files will be created.

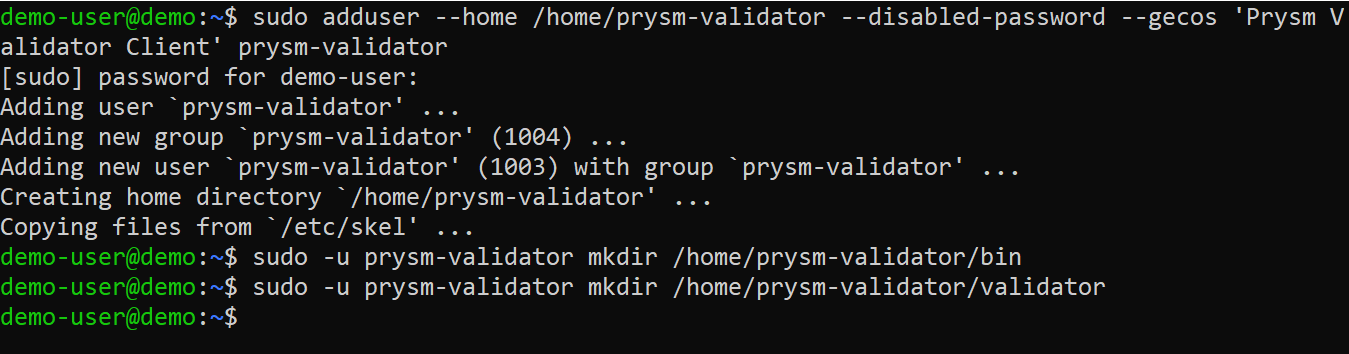
#Step 2: Create the Validator client user
Next, on your server, create a user for the validator client and set up the necessary directories:
sudo adduser --home /home/prysm-validator --disabled-password --gecos 'Prysm Validator Client' prysm-validator
sudo -u prysm-validator mkdir /home/prysm-validator/bin
sudo -u prysm-validator mkdir /home/prysm-validator/validator
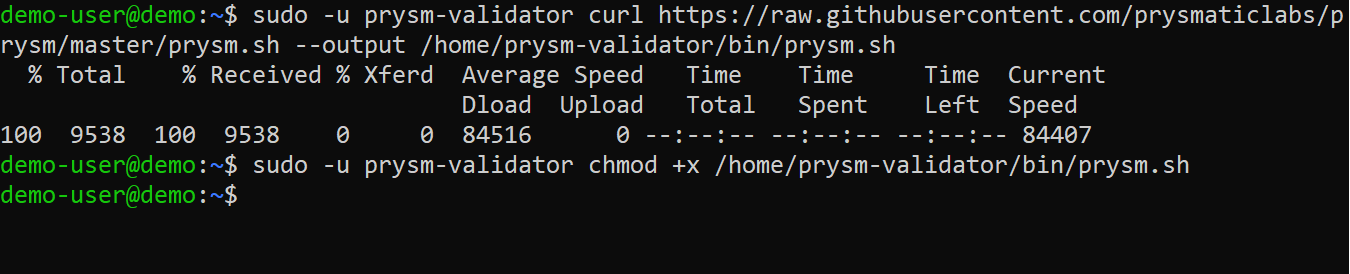
#Step 3: Download the Prysm.sh
Now, download the Prysm.sh script for the validator client and make it executable:
sudo -u prysm-validator curl https://raw.githubusercontent.com/prysmaticlabs/prysm/master/prysm.sh --output /home/prysm-validator/bin/prysm.sh
sudo -u prysm-validator chmod +x /home/prysm-validator/bin/prysm.sh
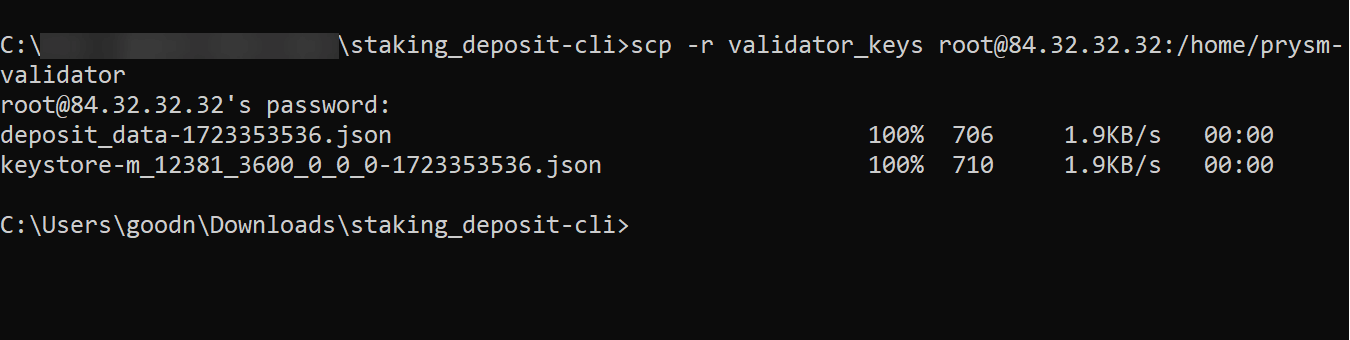
#Step 4: Import the Validator keys
First, securely copy the validator keys to the server and set the appropriate permissions for the directory, making the Prysm validator user the owner.
Transfer the keys:
scp -r validator_keys user@server-ip:/home/prysm-validator
Change ownership and permissions:
sudo chown -R prysm-validator:prysm-validator /home/prysm-validator/validator_keys
sudo chmod 750 /home/prysm-validator/validator_keys

With the validator_keys directory now on the server, import the keys into the Prysm validator client using:
sudo -u prysm-validator /home/prysm-validator/bin/prysm.sh validator accounts import --keys-dir=/home/prysm-validator/validator_keys --mainnet
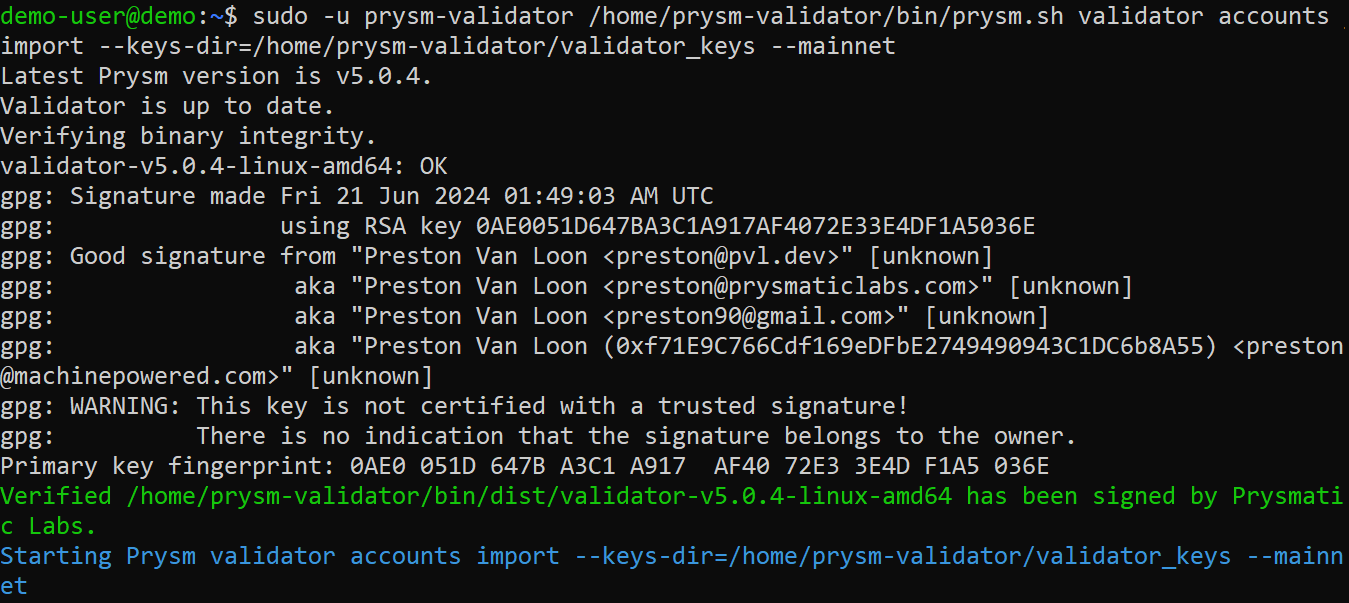
After accepting the terms of service presented, you'll be asked to input a wallet password.

After confirming the password, a new wallet will be created at the default location (/home/prysm-validator/.eth2validators/prysm-wallet-v2).
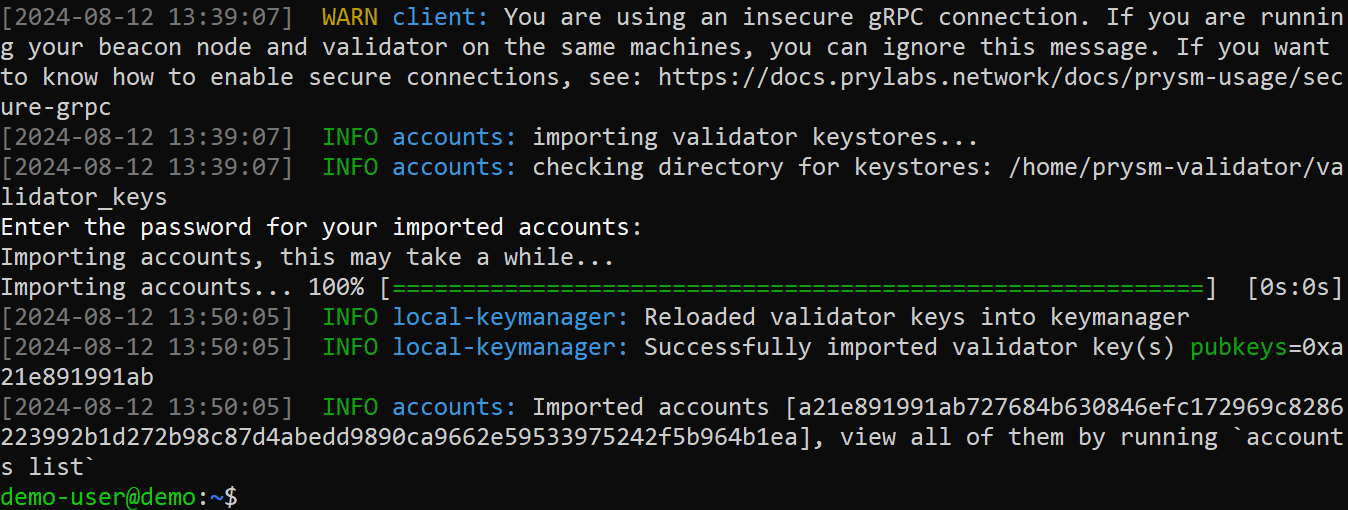
Next, you'll be asked to provide the password for your imported accounts. This is the password you set when creating the validator keys. If the password is correct, the keys will be imported successfully.
Next, change the ownership of the .eth2validators/prysm-wallet-v2 directory and all its contents to the prysm-validator user.
sudo chown -R prysm-validator:prysm-validator /home/prysm-validator/.eth2validators/prysm-wallet-v2

#Step 5: Secure the wallet password
Create a text file that only the validator can access to store the wallet password:
sudo -u prysm-validator touch /home/prysm-validator/password.txt
sudo chmod 600 /home/prysm-validator/password.txt

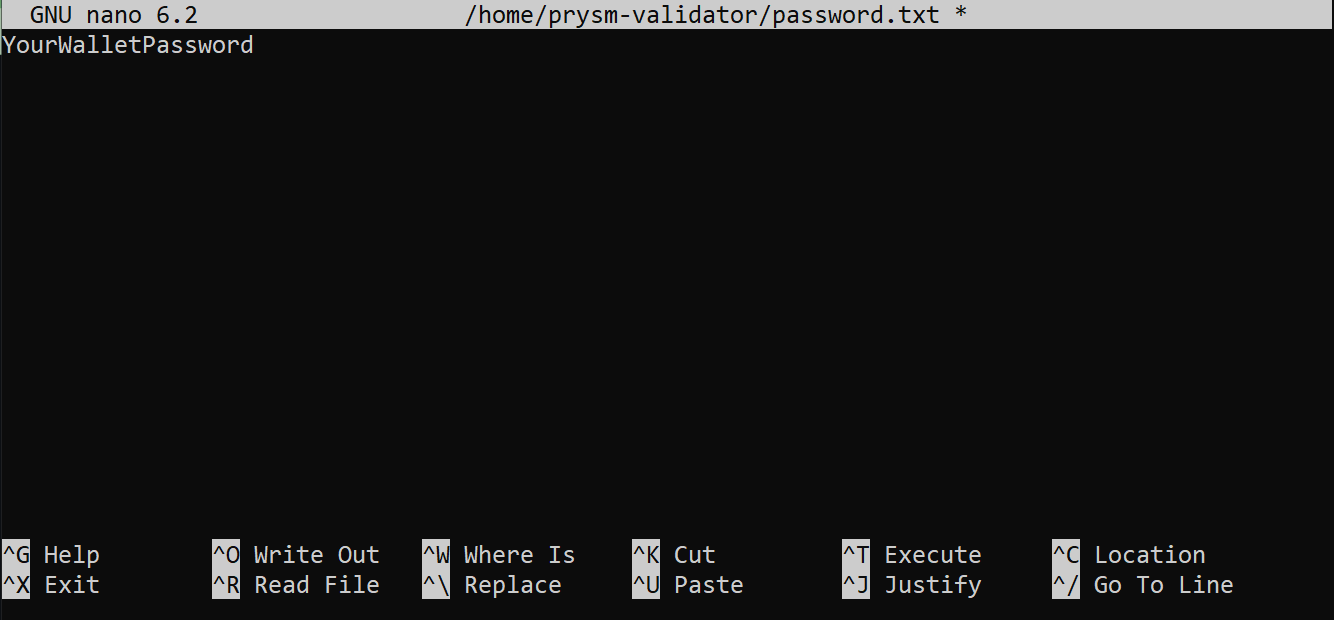
Edit the file and store the wallet password that you created when importing the validator keys:
sudo nano /home/prysm-validator/password.txt
#Step 6: Create a systems service for the validator client
Next, create a systemd service file to manage the Prysm validator client.
Open the service file using the Nano text editor:
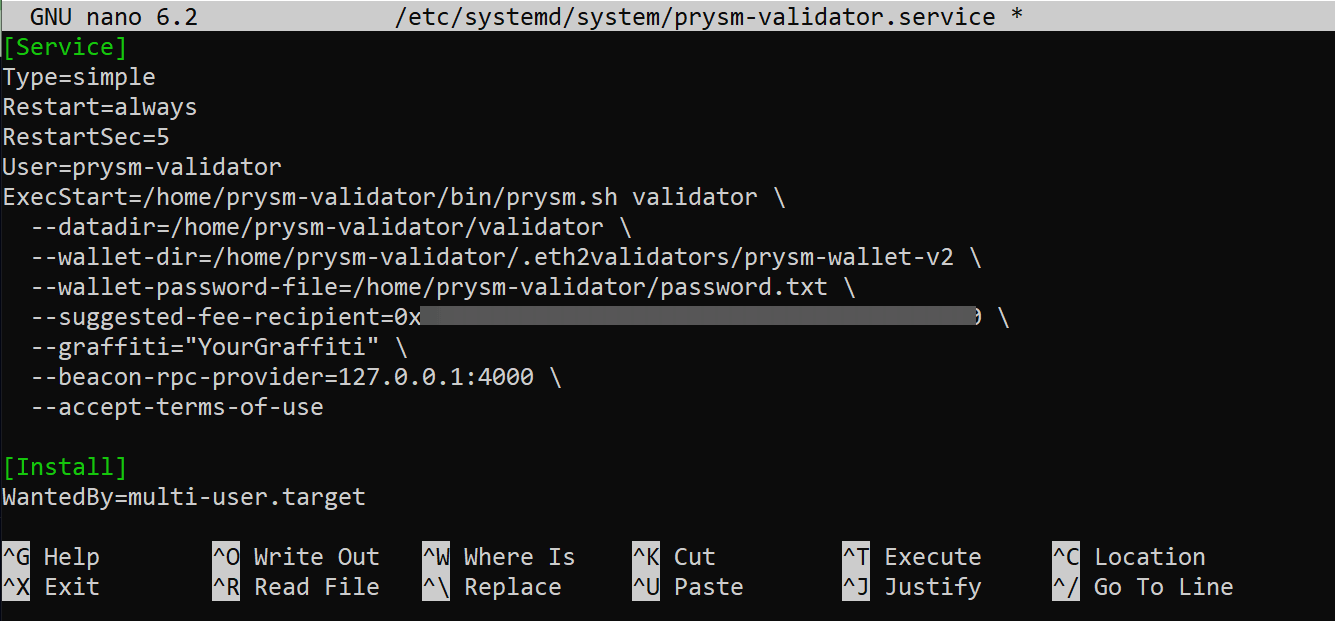
sudo nano /etc/systemd/system/prysm-validator.service
Paste the following configuration:
[Unit]

Description=Prysm Validator Client
Wants=prysm-beacon.service
After=prysm-beacon.service
StartLimitIntervalSec=0

[Service]
Type=simple
Restart=always
RestartSec=5
User=prysm-validator
ExecStart=/home/prysm-validator/bin/prysm.sh validator \
  --datadir=/home/prysm-validator/validator \
  --wallet-dir=/home/prysm-validator/.eth2validators/prysm-wallet-v2 \
  --wallet-password-file=/home/prysm-validator/password.txt \
  --suggested-fee-recipient=YourWalletAddress \
  --graffiti="YourGraffiti" \
  --beacon-rpc-provider=127.0.0.1:4000 \
  --accept-terms-of-use

[Install]
WantedBy=multi-user.target
-
The
--suggested-fee-recipient=YourWalletAddressflag should be replaced with your Ethereum wallet address to receive potential rewards. -
The
--graffitiflag is used to add custom text to the validator’s blocks.
Start and Enable the Validator Service:
Finally, start the validator service and ensure it starts on boot:
sudo systemctl daemon-reload
sudo systemctl start prysm-validator
sudo systemctl enable prysm-validator

Check the logs to ensure both the Beacon Chain and Validator services are running properly:
sudo journalctl -fu prysm-validator
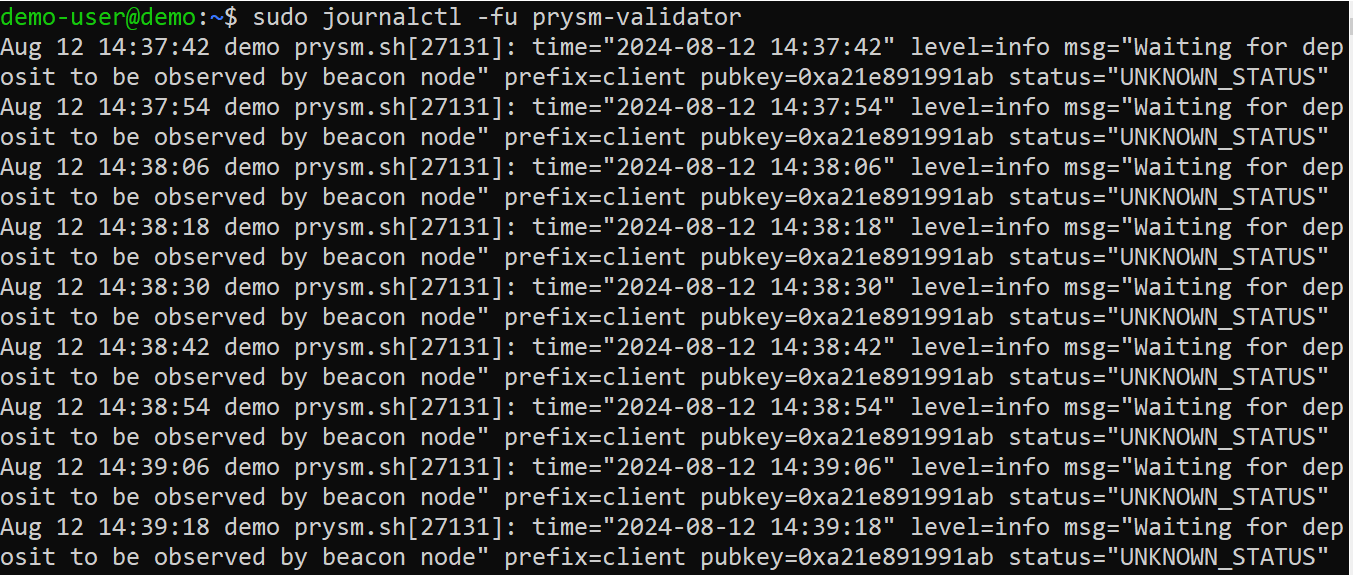
From the logs or status, you should see the message "Waiting for deposit to be observed by beacon node." This occurs because the validator has not yet been activated on the network.
#Step 7: Upload deposit and activate validator
To activate your validator, go to the Ethereum Mainnet Launchpad. Select "Become a Validator," and follow the prompts until you reach the step where you need to upload your deposit data file (deposit_data-*.json). Connect your wallet with at least 32 ETH, review and confirm the details, and proceed to deposit the ETH into the Ethereum deposit contract. After confirmation, monitor your validator to ensure it is recognized by the beacon node and operating correctly.
Once activated, your validator will help verify and confirm transactions and occasionally propose new blocks within the Ethereum network. This participation supports network security and functionality and you’ll earn rewards for performing the tasks correctly.
#Conclusion
At this point, you should have your Ethereum node running or at least have a better understanding of what it takes to run one thanks to this guide. This tutorial walked you through setting up an execution and a consensus client using Geth and Prysm. It also includes the steps for running a validator node with Prysm.
Running your node helps contribute to the network’s decentralization and security while allowing you to earn rewards. Now is a great time to get involved and support the Ethereum network.
Cherry Servers offers pre-built and custom high-performance Ethereum servers on dedicated bare metal cloud, ideal for demanding workloads. Set up your Web3 server in minutes!