How to Remove Docker Images | Step-by-Step

Unused Docker images can accumulate and take up significant disk space. Finding and removing unnecessary Docker images efficiently helps reclaim storage capacity and keep your system clean.
This tutorial demonstrates how to remove Docker images from your system. Before we get into that, let’s briefly examine what Docker is, what Docker images are, and where they are stored.
#What is Docker?
Since its release slightly over a decade ago, Docker has stamped its authority as a reliable and efficient tool for building and deploying applications. Docker is an open-source platform that lets you build, test, and seamlessly deploy and ship distributed applications by leveraging operating-system-level virtualization.
#What are Docker images?
Docker images are read-only templates used to create Docker containers. Docker packages are bundles of software built into Docker images to be run as containers.
Docker packages applications inside containers. These are lightweight, standalone, and isolated units that run independently from the operating system. Containers are platform-agnostic and bundle an application with its dependencies, libraries, tools, and configuration files. This way, the application will run consistently and in the same way, irrespective of the computing platform. Containers allow for more portability, efficiency, and low resource overhead compared to virtual machines.
The downside of Docker is that it’s easy for containers and images to accumulate on your system, leading to space depletion. Thankfully, Docker provides command-line options that help in housekeeping tasks such as removing unused images and containers.
#Where are Docker images stored?
Docker images are most commonly stored in registries, for example, in the default Docker hub or third-party registries like GitLab; however, they can also reside on local disks, clouds, and image repositories.
#Precautionary measures to take before deleting an image
Deleting an image without following precautionary measures can lead to container crashes and the loss of important data. It is important to follow precautionary measures to ensure that no crucial process is killed or lost. Before deleting a Docker image, consider these precautionary measures:
#1. Check container dependencies
The first measure to take is to ensure that no running or stopped containers are associated with the image. Running containers don't depend on images but deleting their images disables you from restarting the containers after it exits. Use the following command to check running containers linked to the image.
docker ps -a --filter ancestor=<image_id_or_name>
If any containers are listed, stop and remove them first:
docker stop <container_id>
docker rm <container_id>
In addition, make sure no other images depend on it (such as base images). If uncertain, inspect image layers carefully:
docker image inspect <image_id>
#2. Backing up data
The general rule is that, do not erase any components unless you have a copy stored elsewhere. Creating a copy of your image before deleting it will ensure that you can turn back to the old container version if the new one fails or you need to do A/B testing.
#3. Confirm image usage
Double-check that the image is no longer in use in Docker Compose, Kubernetes manifests, or CI/CD pipelines.
#4. Update documentation and scripts
Update any documentation or automation scripts referencing the old image to prevent unintended issues.
#Prerequisites
For this tutorial, you need a Linux instance with Docker installed and running. We will be using Ubuntu 20.04 as our Linux environment. If you haven’t got Docker installed, first check out how to install Docker on Ubuntu 20.04 or how to install Docker on Ubuntu 24.04.
Ready to supercharge your Docker infrastructure? Scale effortlessly and enjoy flexible storage with Cherry Servers bare metal or virtual servers. Eliminate infrastructure headaches with free 24/7 technical support, pay-as-you-go pricing, and global availability.
#How to remove Docker images in various ways
This section will demonstrate various ways to remove Docker images, including removing one image, dangling images, and how to remove all Docker images to free valuable disk space.
#1. Remove one or more Docker images
To delete a Docker image, use the docker rmi command and pass the ID of the image you want to remove. The syntax is provided as shown.
docker rmi IMAGE_ID
To get the Docker image ID, list the existing ones using the docker images command.
docker images
If there are no images on your system, the command will only display the column headers.
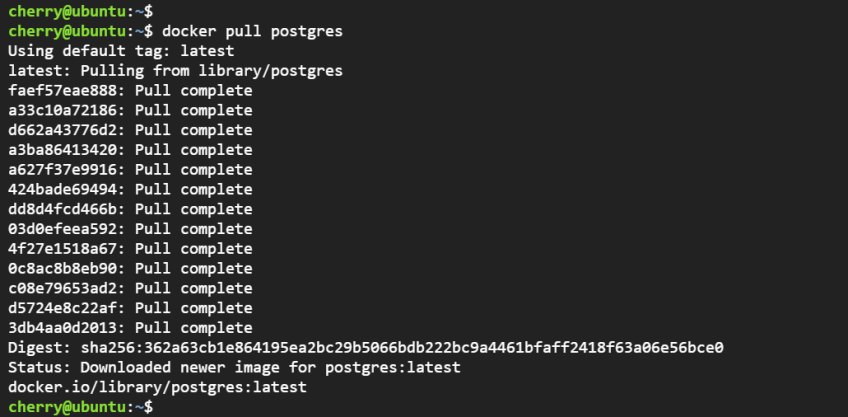
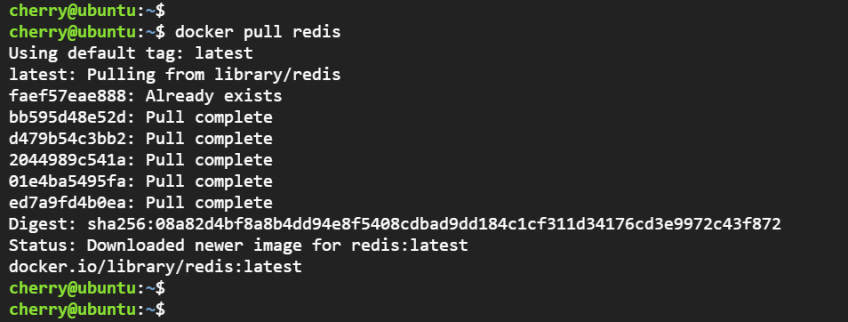
Since there are no Docker images in our setup, let’s download a few from Docker Hub. To do so, run the docker pull command with the image name as the argument. In this example, we will pull postgres and redis images.
docker pull postgres
Similarly, to pull the redis image, run:
docker pull redis
To list the images, run the command:
docker images
This time around, the images will be listed alongside information such as the Tag, Image ID, Dat last modified, and image size.
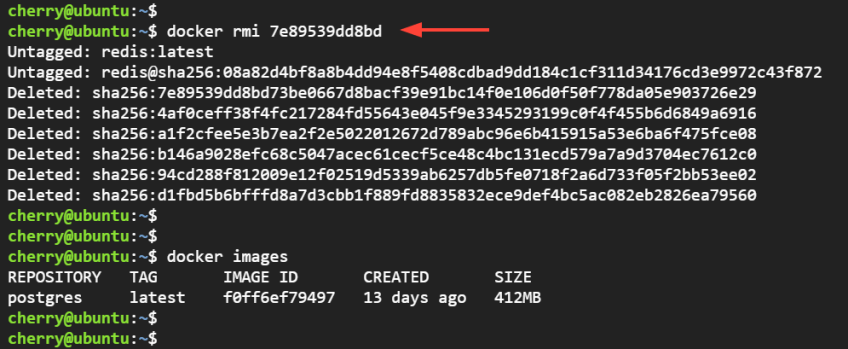
To remove the redis image, run the command shown where 789539dd8bd is the image ID.
docker rmi 789539dd8bd
Once again, list the existing images. Notice that this time around, only the postgres image appears on the list of existing images.
Alternatively, you can remove multiple images at a go by passing multiple image IDs as arguments:
docker rmi image_id_1 image_id_2
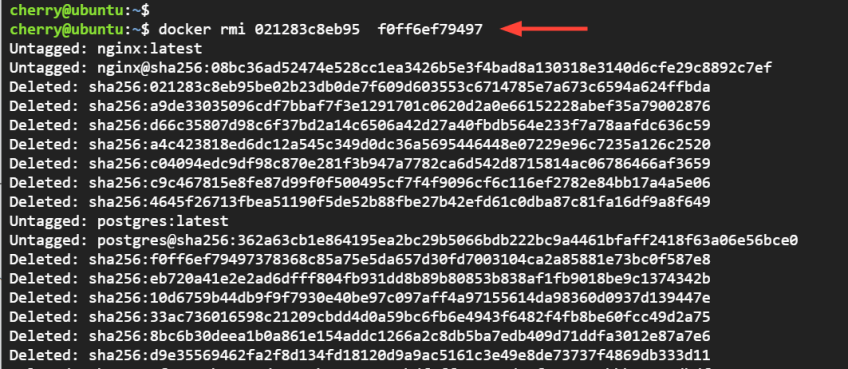
In the following setup, we have two images on our system: nginx and postgres.
docker images
To remove both images with one command, run the docker rmi command and pass the image IDs as arguments.
docker rmi 021283c8eb95 f0ff6ef79497
Also read: How to push an image to DockerHub
#2. Docker: Remove dangling images
Dangling images are untagged Docker images that are not associated with any container. They are created when they are overwritten with a new image with the same name and tag.
Here’s an example of how a docker image can be a dangling image.
Suppose you build an image and tag it cherry-image:v1. After that, you make a few changes and build a new image with the same image name and tag. What happens is that Docker removes the tag from the old image and assigns it to the new image. Consequently, the old image is left without a tag and becomes a dangling image.
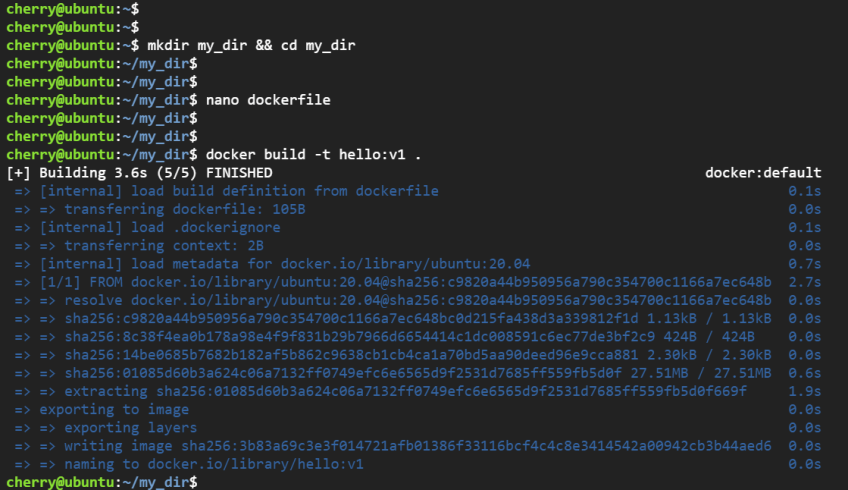
To demonstrate this, we will build a simple image from a Dockerfile that prints hello-world when executed as a Docker container.
Let’s create a sample directory and navigate into it.
mkdir my_dir && cd my_dir
Next, create a docker file called dockerfile without a file extension using your preferred text editor. Here, we are using nano editor.
nano dockerfile
Add the following lines:
# Dockerfile

FROM ubuntu:20.04

ENTRYPOINT ["echo", "Hello World"]
The FROM attribute informs Docker of the base image that we are using, in this case, Ubuntu 20.04. As the name infers, a base image is an image we want to use to create a container image. The ENTRYPOINT attribute configures the executables that will always run when the container is started.
Save the changes and exit the file.
Next, build the image from the Docker file. Notice how we have tagged it hello:v1 using the -t option.
docker build -t hello:v1
Confirm that the image has been created.
docker images
From the output, you can see that the image was successfully created with hello and v1 as the repository and tag names, respectively.
Let’s make an update to the Docker file and set the base image to rockylinux:8 as shown.
# Dockerfile

FROM rockylinux:8

ENTRYPOINT ["echo", "Hello World"]
Let’s now build the image again using the same name and tag.
docker build -t hello:v1
When you list the existing images, you will notice that the older image is now a dangling image. Dangling images neither have a repository name nor a tag. They appear as <none>:<none> where the first <none> refers to the repository name of the image while the second <none> refers to the image tag.
Since they are no longer tagged with an image tag or repository name, dangling images are redundant and serve no purpose. They are still present and take up disk space.
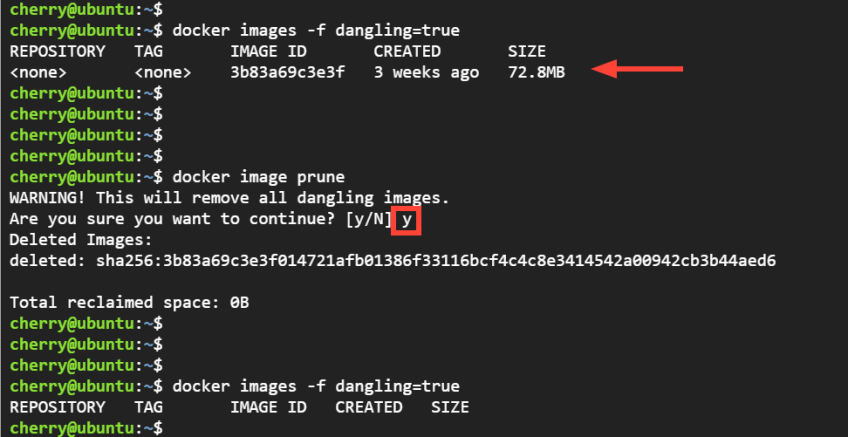
To list dangling images, run the command:
docker images -f dangling=true
To remove dangling images in Docker, execute the command:
docker image prune
Be sure to press y to proceed with removing all dangling Docker images.
#3. Remove Docker images associated with running containers
For the most part, you will have Docker images associated with running container images. In that case, you will run into an error when you attempt to remove the image. You must remove the container first before removing the image.
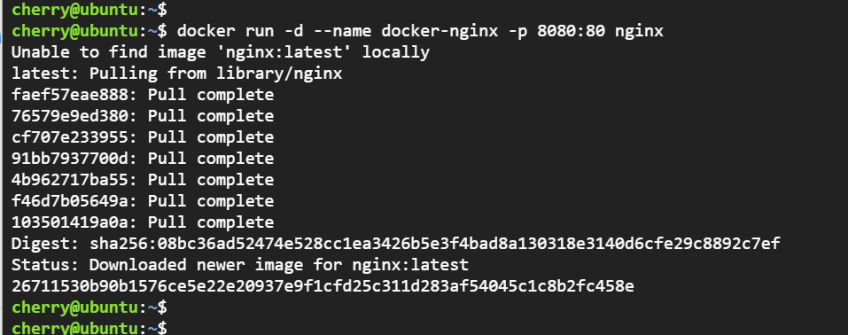
To better illustrate this, let’s create an Nginx container image from Docker hub and run it in the background.
docker run -d --name docker-nginx -p 8080:80 nginx
The command pulls the Nginx image from the Docker hub repository and creates a running container from it. The -d flag runs the container in detached mode or in the background in order to free up the terminal for the user to run other commands. The -p or --publish flag maps port 80 on the container to port 80 on the host.
If you attempt to remove the image, you will encounter the error shown since the image is already being used by the Nginx container.
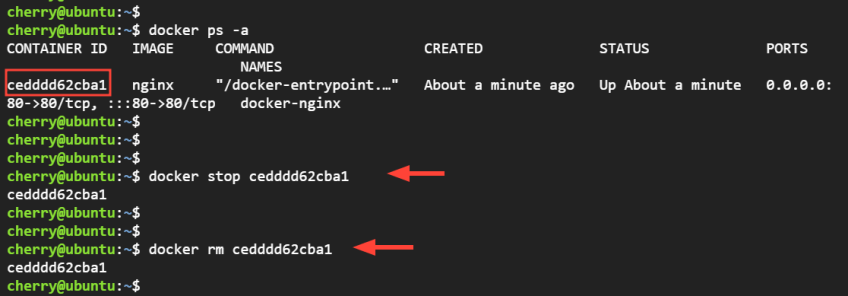
To get around this obstacle, you need to remove the container first. To accomplish this, you need the container ID, which you can obtain using the docker ps -a command. The command lists all containers on your system, both in running and stopped state.
docker ps -a
With the container ID at hand, stop the running container. To accomplish this, run the docker stop command and pass the container ID as the argument.
docker stop cedddd62cba1
Next, remove the container using the docker rm command.
docker rm cedddd62cba1
The output of both commands prints out the container ID to the terminal.
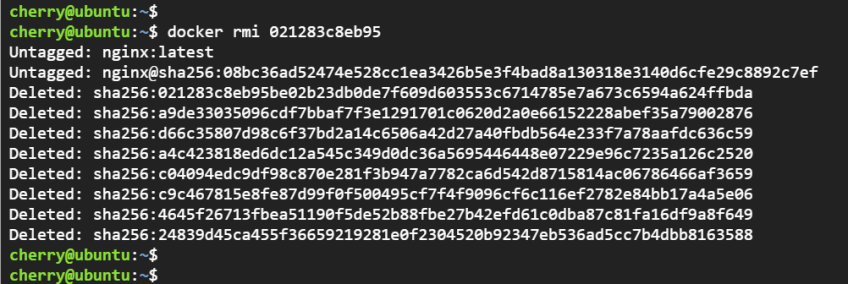
Once you have successfully removed the container, proceed and remove the Docker image.
docker rmi 021283c8eb95
#4. Remove all Docker images
To remove all Docker images, including unused and dangling ones, run the following command.
docker rmi $(docker images -a -q)
#Conclusion
This guide has covered basic commands used to remove Docker images. For more information, check out the official Docker documentation for docker image, docker rmi, and docker system prune Docker CLI.
Thanks for learning with Cherry Servers! Our open cloud infrastructure gives developers complete control, stable workloads, and free technical support 24/7. We offer dedicated servers, virtual servers, anonymous hosting, and more to adjust to your workloads.
Starting at just $3.24 / month, get virtual servers with top-tier performance.


