How to Deploy Hybrid Smart Contracts Using Chainlink | Step-by-Step


Hybrid smart contracts leverage both the speed and low costs of layer two solutions and the security of settling transactions on the underlying blockchain, combining its state on-chain features with off-chain components to leverage the strength of both environments.
In this tutorial, I'll teach you how to write and deploy hybrid smart contracts using Chainlink. You'll install and set up Foundry, create a hybrid smart contract utilizing Chainlink's price data oracle, and use Foundry to deploy and verify it on the Polygon Mumbai Testnet.
#Prerequisites
To understand the entirety of this tutorial, you should have a basic understanding of the following concepts:
Throughout this tutorial, you will learn how to:
- Install and set up Foundry;
- Create a hybrid smart contract utilizing Chainlink's price data feed aggregator contract;
- Use Foundry to deploy and verify on the Polygon Mumbai Testnet.
But first of all, let’s clarify what hybrid smart contracts, Foundry, and Chainlink oracle are. If you are already familiar with these concepts, skip to step 1 to get started.
#What are hybrid smart contracts?
Hybrid smart contracts, just like regular smart contracts, are built and deployed to the blockchain to serve the purpose of decentralized and trustless transactions. The only difference here is that hybrid smart contracts are not entirely decentralized; however, it doesn't make them any less trustless.
A hybrid smart contract follows the rule of a regular smart contract but also combines its state on-chain features with off-chain components to leverage the strength of both environments. Unlike traditional smart contracts, hybrid smart contracts integrate external data sources, APIs, and other off-chain information provided by an oracle protocol like Chainlink. The on-chain component typically handles critical functions, such as executing and enforcing the contract terms. At the same time, off-chain elements provide supplementary information or interact with real-world data.
Hybrid smart contracts aim to address limitations related to the deterministic and isolated nature of on-chain execution by incorporating real-time and dynamic data from external sources. This approach fosters sophisticated and adaptable decentralized applications (DApps) that can respond to real-world events and conditions.
#What is Foundry?
Foundry is an open-source developer platform that provides tools and frameworks to improve building, deploying, and scaling Ethereum DApps and smart contracts to be more accessible and productive. It helps perform complex logic and data transformations before integrating the results into smart contracts.
Moreover, Foundry enhances smart contracts' scalability, interoperability, and functionality by allowing seamless integration with external data sources, APIs, and systems. It expands the capabilities of blockchain-based applications, allowing them to access real-world data and execute off-chain computations while maintaining the security and immutability of on-chain execution.
#What is Chainlink oracle?
The Chainlink oracle solves the problem of blockchain's inability to work with real-world data.It operates as a centralized protocol, processing off-chain data using computational algorithms to achieve functionalities to solve the blockchain oracle problem.
#What is the Polygon Mumbai network?
Mumbai is a designated testnet in the Polygon ecosystem, fully compatible with the Ethereum Virtual Machine (EVM). It is an Ethereum Layer 1 blockchain built by Polygon to offer secure, low-cost, developer-friendly ways for anyone, anywhere, to build decentralized apps. For this tutorial, you'll be deploying the on-chain components of your hybrid contract on the Mumbai networks to get aggregated price feeds from the Polygon Mumbai Network.
#How to deploy hybrid smart contracts using Chainlink: Step-by-step
To get started with deploying your hybrid smart contract, you will need to follow a few steps, which include getting an Oracle contract address from Chainlink, getting faucets for deploying on the test net, setting up your environment, and writing your smart contract. Let's dive right in.
#Step 1: Get the Chainlink aggregator contract
Chainlink has a collective archive of multiple oracle contract addresses deployed on multiple blockchains. The following steps below will get you started on how to get the required oracle contract address from Chainlink.
1. Head to Chainlink website
Head over to the page on Chainlink where you have the listed collections of all aggregator contracts deployed on multiple networks by Chainlink. Click on the polygon icon and scroll to the bottom of the page to find your preferred contract address, which will serve as the off-chain component of deployed the hybrid contract.
2. Get the Chainlink oracle address
The addresses are all deployed versions of the aggregator contract that returns the current price of two token swaps (depending on the pair you choose) on that chain.
Note: The aggregator contracts use an off-chain multilayer determining algorithm that calculates an accurate and average price for the currency swap on multiple chains.
For this tutorial, you'll use the contract address 0x0715A7794a1dc8e42615F059dD6e406A6594651A for getting the price feed of the token pair ETH/USD on the Mumbai testnet. Save the deployed contract link for later.
#Step 2: Get your faucets
Faucets are simple test funds that you can spend on testnets, they simulate spending real funds on any chain's mainnet.
You can store the contract address in any file in your workspace. Here's a quick guide on how to add the Polygon Mumbai testnet to your wallet (Metamask or more).
Then head over to the link to get Matic test faucets here.
#Step 3: Set up the Foundry
Now, it's time to start writing code, but first, you'll need to set up your development environment to get started.
- Run the code below on your terminal, to create a new, ./directory, enter the newly opened directory, and open up a new workspace on your preferred IDE.
mkdir hybrid_contract
cd hybrid_contract
code .
- Next, run the command
curl -L https://foundry.paradigm.xyz | bashto install Foundry. - Run the command
source ~/.bashrcto apply the changes that add foundryup to your PATH variable. - Run the command
foundryupto install other Foundry modular toolkits,castforgeanvilchisel. Accept all prompts in the installation process by typingy. - Run the command
apt install npm. - Post installation of the package, run the command forge init on a bash terminal to initialize the Foundry workspace, you can add the --force flag if you get an error.
- Run the command
forge install smartcontractkit/foundry-chainlink-toolkitto install the Chainlink library where you have all instances of the Chainlink contract kit. - Lastly, run the command
forge install forge stdto install the forge standard library. - Create a new file in your main directory
.envand create the variables:
POLYSCAN_API_KEY=<your-polygon-api-key>
SECRET_KEY=<your-wallet-secret-key>
MUMBAI_MATIC=<your-polygon-rpc-url>
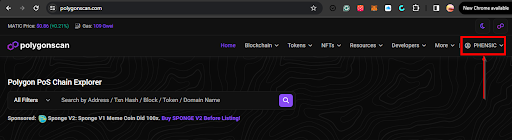
- To get your polygon scan API key Go to polygon scan using the link, to get your public key.
- Sign up or Sign in to create an account and click on your profile icon at the top-left of the page.
- From the drop-down, select
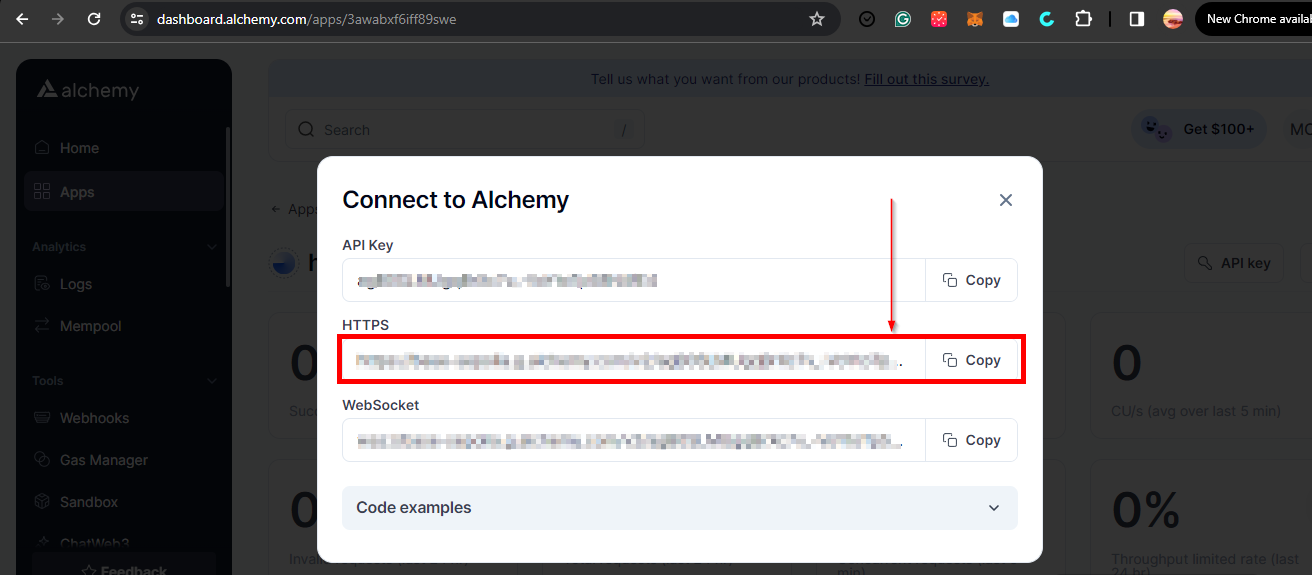
API Keys, and you'll be redirected to a new page to create a new API key to populate the variablePOLYSCAN_API_KEYin your.envfile. - Head over to the link to create a new application and copy your new
RPC URLincluding yourRPC-API-keylike in the image below, to populate the variableMUMBAI_MATICin your.envfile.
Possible error:
Just in case you encounter an error while trying to install the libraries, Chainlink specifically, try changing the directory to the lib folder and running the command git clone org-25111032@github.com:smartcontractkit/chainlink-brownie-contracts.git. You can read more about this here.
#Step 4: Write the smart contract
Head over to the src folder in your workspace, rename the contract to DataFeed.sol, and replace the code with the one below.
// SPDX-License-Identifier: MIT
pragma solidity ^0.8.10;

import {AggregatorV3Interface} from "@chainlink/contracts/src/v0.8/interfaces/AggregatorV3Interface.sol";

contract DataFeed {

    address private immutable i_owner;
    AggregatorV3Interface private s_priceFeed;
   constructor(address priceFeed) {
        s_priceFeed = AggregatorV3Interface(priceFeed);
        i_owner = msg.sender;
    }
    function getPrice(AggregatorV3Interface priceFeed) public view returns (uint256) {
        (, int256 answer,,,) = priceFeed.latestRoundData();
        // ETH/USD rate in 18 digit
        return uint256(answer * 10000000000);
    }

    function getLatestRoundData() public view returns (uint80 roundId, int256 answer, uint256 startedAt, uint256 updatedAt, uint80 answeredInRound) {
            return s_priceFeed.latestRoundData();
        }

    function getDecimals() public view returns (uint8) {
        return s_priceFeed.decimals();
    }
    function getDescription() public view returns (string memory) {
        return s_priceFeed.description();
    }

    // 1000000000
    // call it get fiatConversionRate, since it assumes something about decimals
    // It wouldn't work for every aggregator
    function getConversionRate(uint256 ethAmount, AggregatorV3Interface priceFeed) public view returns (uint256) {
        uint256 ethPrice = getPrice(priceFeed);
        uint256 ethAmountInUsd = (ethPrice * ethAmount) / 1000000000000000000;
        // the actual ETH/USD conversation rate, after adjusting the extra 0s.
        return ethAmountInUsd;
    }

    function getVersion() public view returns (uint256) {
        return s_priceFeed.version();
    }


    function getOwner() public view returns (address) {
        return i_owner;
    }

    function getPriceFeed() public view returns (AggregatorV3Interface) {
        return s_priceFeed;
    }
}
Specifics:
The contract above sets a wrapper around the Chainlink price feed oracle, providing functions to fetch data, converse rates, and other metadata related to the price feed. Assuming you are familiar with the Solidity language, here is a quick breakdown of what happens in the smart contract above.
- After Setting the contract's license
SPDX-License-IdentifiertoMITand the solidity version. First, the contract is initialized with the nameDataFeed. - The Import Statement:
import {AggregatorV3Interface} from "@chainlink/contracts/src/v0.8/interfaces/AggregatorV3Interface.sol"; imports theAggregatorV3Interfaceinterface from the Chainlink contracts. The interface is used to interact with external data feeds. - DataFeed Contract: This is the main contract defined in the file.
- State Variables: -
i_owner: An immutable private variable storing the address of the contract deployer. -s_priceFeed: An immutable private variable storing the address of the AggregatorV3Interface contract representing the price feed. - Constructor: The constructor function initializes the
s_priceFeedvariable with the address of the AggregatorV3Interface contract passed as an argument, and sets thei_ownervariable to the address of the deployer. - View Functions:
getPrice: Retrieves the latest price from the price feed oracle and converts it to a uint256 value representing the ETH/USD rate in 18 digits.getLatestRoundData: Retrieves the latest round data from the price feed oracle.getDecimals: Retrieves the number of decimal places used by the price feed contract. - -getDescription: Retrieves the description of the price feed contract.
- State Variables: -
- Conversion Function: -
getConversionRate: Calculates the conversion rate of a given amount of Ether to USD based on the current price feed data. - Getter Functions:
getVersion: Retrieves the version of the price feed contract.getOwner: Retrieves the address of the contract deployer.getPriceFeed: Retrieves the address of the price feed oracle. Go to the directoryscriptto rename the contractDataFeed.s.soland paste the code below into the file.
// SPDX-License-Identifier: UNLICENSED
pragma solidity ^0.8.13;

import {Script, console} from "forge-std/Script.sol";
import {DataFeed} from "../src/DataFeed.sol";

contract DeployDataFeed is Script {
    function setUp() public {}

    function run() public returns (address) {
        vm.startBroadcast();
        DataFeed dataFeed = new DataFeed(0x0715A7794a1dc8e42615F059dD6e406A6594651A);
        vm.stopBroadcast();
        return address(dataFeed);
    }
}
Specifics:
The contract above acts as your deployment script in Solidity for the main DataFeed.sol contract. When executed, it will deploy a new instance of the DataFeed contract with the specified address as a constructor argument and return the address of the deployed contract.
- Import statements:
import {Script, console} from "forge-std/Script.sol";: This imports theScriptand -consoleutilities from the Forge standard library.Script is a base contract that provides functionality for writing scripts for contract deployment and interaction.consoleis used for logging messages during script execution.import {DataFeed} from "../src/DataFeed.sol";: This imports the DataFeed contract from theDataFeed.sol` file located in the src directory of the project.
- Contract definition: The contract
DeployDataFeedis defined as a script contract, indicated by the inheritance fromScript. - Functions:
setUp(): This function is defined but empty. It doesn't perform any actions.run(): This function is the main entry point of the script. It deploys a new instance of theDataFeedcontract with the address0x0715A7794a1dc8e42615F059dD6e406A6594651Aas an argument. It starts and stops broadcasting events using d.vm.startBroadcast()andvm.stopBroadcast()respectively. Finally, it returns the address of the deployedDataFeedcontract.
#Step 6: Deploy and verify the contract
- First, go to the
foundry.tomlfile in your main directory and add the following lines of code:
remappings = [
    '@chainlink/contracts/=lib/chainlink-brownie-contracts/contracts/',
    '@forge-std=lib/src'

]
-
The
remappingarray helps with routing the import statements in your contract to the rightlibsource. -
To deploy and verify your contract at the same time, you can either run the command while putting in your private details in the command directly.
forge create --rpc-url <your-rpc-url> --constructor-args "0x0715A7794a1dc8e42615F059dD6e406A6594651A" --private-key <your-wallet-private-key> script/DataFeed.s.sol:DeployDataFeed --etherscan-api-key <your-polygon-scan-api-key> --verify
Note: the contract address in the command is the deployed pricedfeed contract from Chainlink, which you stored earlier.
-
Or, run the command
source .envto export your private details. -
Finally, run the command.
forge create --rpc-url MUMBAI_MATIC --constructor-args "0x0715A7794a1dc8e42615F059dD6e406A6594651A" --private-key SECRET_KEY script/DataFeed.s.sol:DeployDataFeed --etherscan-api-key POLYSCAN_API_KEY --verify
And you should get a response of this sort.
[⠰] Compiling...
[⠒] Compiling 2 files with 0.8.23
[⠑] Solc 0.8.23 finished in 3.18s
Compiler run successful!
Deployer: 0x4B96F9F8fe84577e65A17c666b76769a395d8273
Deployed to: 0x5486C1aDC0c6Ac4Ffedb855E969C826fd23C19F9
Transaction hash: 0xfdad96187bb4b6edd45a6641939a41f01069661d273dd808899c9fab4a60625e
Starting contract verification...
Waiting for etherscan to detect contract deployment...
Start verifying contract `0x5486C1aDC0c6Ac4Ffedb855E969C826fd23C19F9` deployed on mumbai

Submitting verification for [src/DataFeed.sol:DataFeed] 0x5486C1aDC0c6Ac4Ffedb855E969C826fd23C19F9.

Submitting verification for [src/DataFeed.sol:DataFeed] 0x5486C1aDC0c6Ac4Ffedb855E969C826fd23C19F9.

Submitting verification for [src/DataFeed.sol:DataFeed] 0x5486C1aDC0c6Ac4Ffedb855E969C826fd23C19F9.
Submitted contract for verification:
        Response: `OK`
        GUID: `upedrsziekvycvd1sjqhr6hsdydbwdcwdp8avgcgf9seqmu2s8`
        URL: https://mumbai.polygonscan.com/address/0x5486c1adc0c6ac4ffedb855e969c826fd23c19f9
Contract verification status:
Response: `NOTOK`
Details: `Pending in queue`
Contract verification status:
Response: `OK`
Details: `Pass - Verified`
Contract successfully verified
Having your wallet public address, the deployed contract address on Polygon Mumbai, the deployment transaction hash, and other verification details like your Globally Unique Identifier GUID and verification status.
#Step 7: Get price feed data from contract
- Head over to Mumbai polygon scan using the link, and paste your deployed wallet address in the search bar, in this case,
0x5486C1aDC0c6Ac4Ffedb855E969C826fd23C19F9. And you'll notice you have proof of a verified contract.
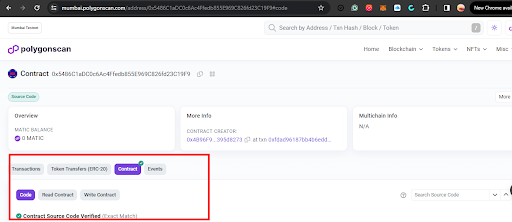
- Click on the contract
Read Contractbutton and you find all the callable functions created in your solidity file. - Click on
Connect to web3to connect your metamask wallet, to be able to make the function calls.-
The
getConversionRatefunction takes any value inethand the address of the Chainlink price feed contract address and returns the amount of theusdtequivalent inuint256.
-
To verify, you can head over to your browser and search
eth usdt rateconverter, and enter the same price amount and you'll get a similar response.
-
The
getDecimalreturns the number of decimal places used by the Chainlink Price Feed oracle to represent prices.
-
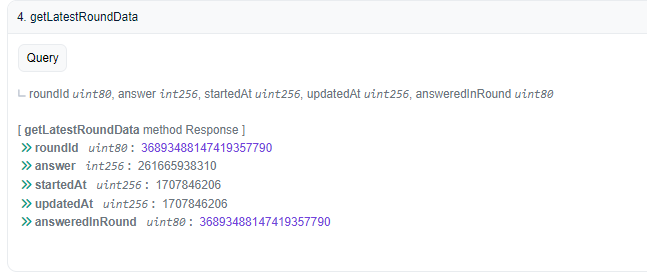
The
getLatestRoundDatafetches the latest round data from the Chainlink Price Feed oracle. It returns the round ID, answer (price), timestamp of when the round started, timestamp of when the round was updated, and the round ID in which the answer was recorded.
-
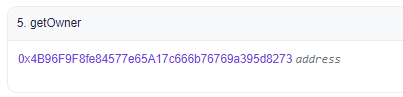
The
getOwnersimply returns the deployer of the contract.
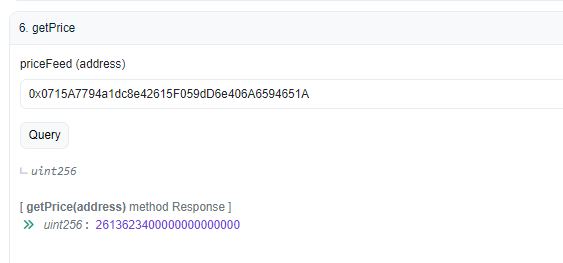
-
The
getPricetakes anpriceFeedaddress, in this case,chainlink hybrid contractas an argument, and returns the latest price fetched from the Chainlink Price Feed oracle. It retrieves the latest round data from the specified price feed and returns the answer (price) after converting it to a uint256 value. -
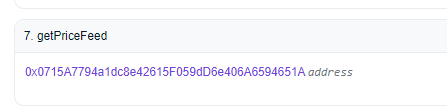
The
getPriceFeedcall returns the address of the address of the Chainlink Price Feed oracle associated with theDataFeedcontract.
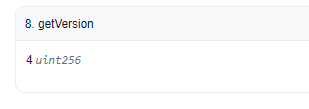
-
Calling the
getVersionfunction returns the current version of the Chainlink Price Feed oracle.
-


Voila!, after following all the steps above, you have not only created a hybrid smart contract using Chainlink oracle, but you also successfully set up a foundry workspace, and verified your smart contract on deployment using foundry frameworks and commands.
You also deployed to the Polygon Mumbai blockchain and verified the proficiency of your contract on-chain.
#Conclusion
Deploying and interacting with hybrid contracts that retrieve price feed from an aggregation collection of multiple live sources is only the start of how to utilize hybrid contracts and the things you can build with them.
You might consider building your own Automated Money Maker (AMM) or Decentralized Exchange (DEX), starting from the basics of hybrid contracts. Some other hybrid contract features could be generating randomness, VRF, automated transaction execution, etc.
Check out our Web3 infrastructure and our documentation to know how you can start running your blockchain node using our deployed blockchain servers at Cherry Servers accessible at any location.