How to host a Discord bot on a VPS: Ultimate Guide


A Virtual Private Server (VPS) offers more control and scalability options than shared or local hosting for your Discord bot. Using a VPS means that you can configure the environment specifically for your bot. Hosting a Discord bot on your VPS requires several things: setting up your VPS, configuring it for security and deployment, and ensuring that your bot runs smoothly in the background. This guide will enable you to get all that done.
#Prerequisites
Before beginning, ensure you have the following:
- A VPS with an Ubuntu 24.04 operating system.
- SSH access to the VPS (with Root or sudo user privileges).
- A Discord server
#How to Host a Discord Bot on a VPS
This guide explains how to set up your VPS, configure it for security, and deploy a Discord bot, ensuring it runs smoothly in the background.
#Step 1: Setting up the VPS
Before attempting to host your bot, some initial settings need to be implemented on the server for the bot to run properly. This section outlines steps to prepare the VPS for hosting the bot.
-
Obtain your VPS’s IP address and credentials from your hosting provider.
-
Open a terminal on your local machine and connect to the VPS using SSH:
ssh root@your-vps-ipReplace
your-vps-ipwith the actual IP address of your VPS. -
If prompted, confirm the SSH connection by typing "yes".
-
Update the package lists and upgrade existing packages:
apt update && apt upgrade -y -
Install essential tools, including Python:
apt install -y python3-pip python3.12-venv
The python3-pip package allows you to install Pip, Python’s package manager that installs and manages Python packages and dependencies easily in a virtualized environment. The python3.12-venv package installs a virtual environment that lets you install and run applications in sandboxed or isolated Python environments.
#Step 2: Configuring firewall and security settings
To ensure your bot runs securely and can communicate with Discord servers, you need to configure your firewall and adjust security settings. This step helps prevent unauthorized access to your server.
-
Install and enable UFW (Uncomplicated Firewall):
apt install -y ufw
ufw allow OpenSSH # Allow incoming traffic for the OpenSSH service
ufw enable
These commands are used to install and configure a firewall on a Linux system using UFW (Uncomplicated Firewall). The first command,
apt install -y ufw, installs UFW, a simple tool to manage firewall rules.The
-yflag automatically confirms the installation. The second command,ufw allow OpenSSH, allows incoming traffic on the OpenSSH port (port 22), which is necessary for remotely accessing the server via SSH.This is important in ensuring you can connect to the VPS after enabling the firewall. Finally, the
ufw enablecommand activates the firewall, applying the rules set by UFW. -
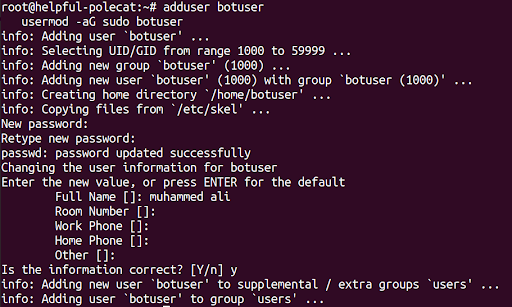
Set up a new user with limited privileges:
adduser botuser
usermod -aG sudo botuser
The output of this command will prompt you to input a new password, full name, etc. Fill in the password and you can ignore the other prompts (if you want to) by pressing ENTER key.

-
Log in as the new user to continue the setup:
ssh botuser@your-vps-ip
#Step 3: Setting up a Discord application
Here we will work on setting up the Discord application that will contain the bot. Go to the Discord Developer Portal and log in with your Discord account.
-
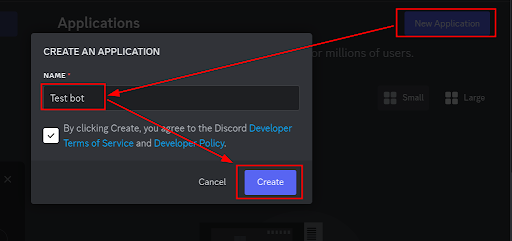
Click the "New Application" button, provide a name for your bot, and create the bot.

-
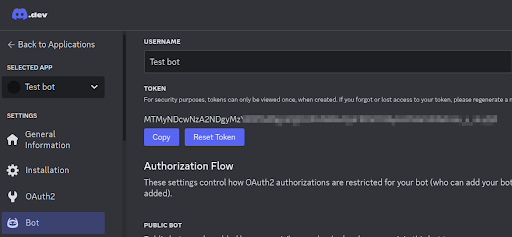
Generate a bot token:
- Select the "Bot" tab on the left menu.
- Under the "Token" section, click "Reset Token" and copy it.
- Save the generated token; you will need it later.

-
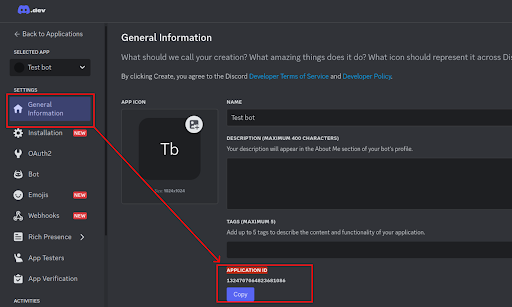
Get your Application ID:
- Go to “General Information” and save the “Application ID.”

- Go to “General Information” and save the “Application ID.”
-
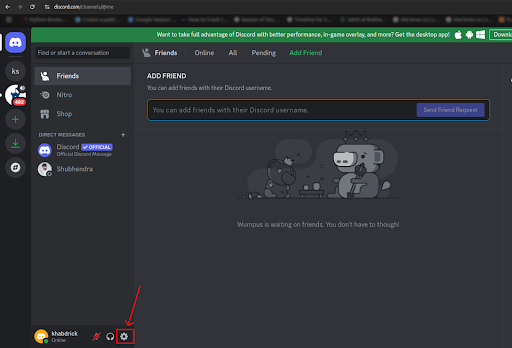
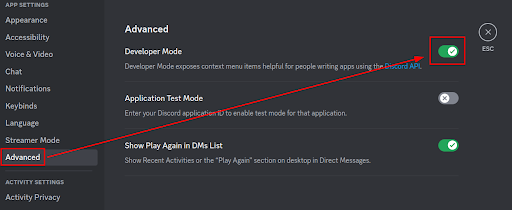
Enable developer mode in your Discord settings.
-
You can toggle developer mode to "on" by going to Advanced on your Discord server settings and then enabling “Developer Mode.”


-
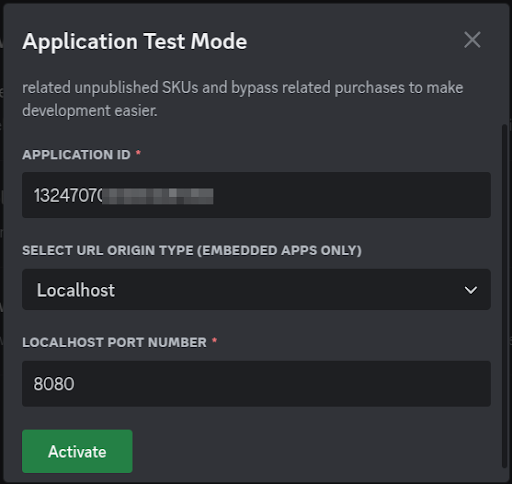
Enable the Application Test Mode switch and enter your Application ID, set the URL origin type to localhost, and the port number as 8080 before clicking the “Activate” button.

-
-
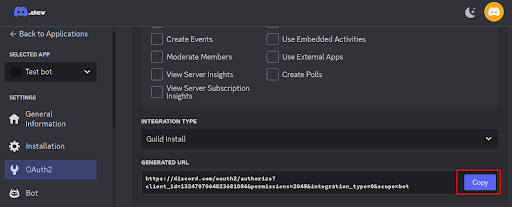
Create an OAuth2 URL:
-
Click the "OAuth2" tab in the Developer Portal.
-
Scroll down to the "OAuth2 URL Generator" section and check the “bot” option.
-
Under "Bot Permissions," choose the permissions your bot needs. As we are just sending messages, select “Send Messages”.
-
Copy the generated URL.

-
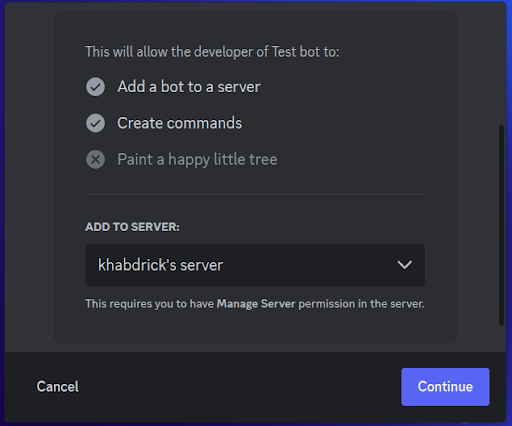
Paste the URL into your browser and invite the bot to your server.

-
-
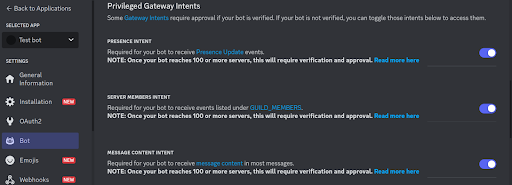
To enable your bot to read messages from the server, you must enable all the “Privileged Gateway Intents” in the Bot tab.

#Step 4: Build the Discord bot
Here, we will build a bot that responds with “pong” when pinged. The ping and pong will be activated in the Discord chat, where the bot was invited.
-
Create a
requirements.txtfile:discord.py==2.0.0 python-dotenv -
Create a file called
bot.pyand replaceYOUR_DISCORD_TOKENwith your actual token.import discord import os from dotenv import load_dotenv from discord.ext import commands intents = discord.Intents.default() intents.message_content = True bot = commands.Bot(command_prefix="!", intents=intents) load_dotenv() @bot.event async def on_ready(): print(f'Logged in as {bot.user.name}') @bot.command() async def greet(ctx): await ctx.send('Hello, I am your Discord bot') @bot.command() async def list_command(ctx): await ctx.send('You can use the following commands: \n !greet \n !list_command \n !functions') @bot.command() async def functions(ctx): await ctx.send('I am a simple Discord chatbot! I will reply to your command!') TOKEN = os.getenv('DISCORD_TOKEN') bot.run(TOKEN) -
Create a
.envfile:DISCORD_TOKEN=your-bot-token
#Step 5: Sending the Discord bot to VPS
Here we will send the bot folder we have locally to the VPS so that we can run it there.
-
Transfer files using
scp:scp -r /path/to/local/bot botuser@your-vps-ip:/home/botuser/discord-bot
-
Navigate to the bot’s directory on your VPS and install dependencies:
cd discord-bot
python3 -m venv bot_env
source bot_env/bin/activate
pip3 install -r requirements.txt

#Step 6: Running the Discord bot
This section explains how to launch and maintain the bot on the VPS.
#Running the bot in the background
screen is a terminal multiplexer in Linux that allows you to run processes or programs in virtual terminal sessions that persist even after you disconnect from your SSH session. In this section, you will learn how to use screen to run your discord bot.
-
Install
screento keep the bot running after disconnecting:sudo apt install -y screen -
Start a new screen session:
screen -S discord-bot -
Run the bot:
python bot.py
-
Detach from the session by pressing
Ctrl+A, thenD.

#Testing the bot on Discord
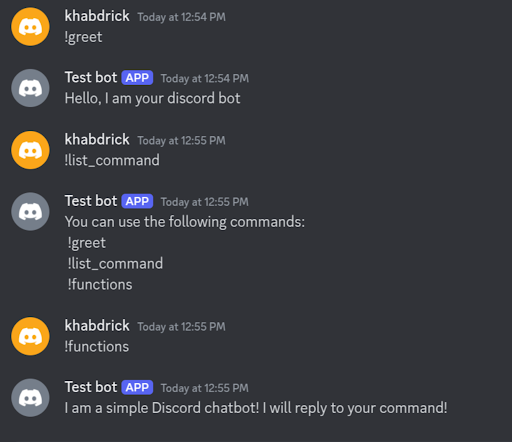
Test all commands and features to confirm they function as expected. In our case, we have only three commands.
On your discord server, type any of the following commands:
!greet
!function
!list_command
#Updating the bot functionality
As your bot is being used, you'll need to update its code to add new features, fix bugs, or improve performance. This section will guide you through the process of updating your Discord bot’s functionality and ensuring that the new version is deployed smoothly on your VPS.
-
SSH into your VPS:
ssh botuser@your-vps-ip -
Navigate to the bot’s directory and activate the virtual environment:
cd discord_bot source bot_env/bin/activate -
Add
requeststorequirements.txt:discord.py==2.0.0 python-dotenv requests==2.28.1 -
Install new dependencies:
pip install -r requirements.txt -
Make changes to your bot’s code in your local development environment. These changes could include adding new commands, handling more events, or integrating new APIs.
To add a new command to your bot, you would modify
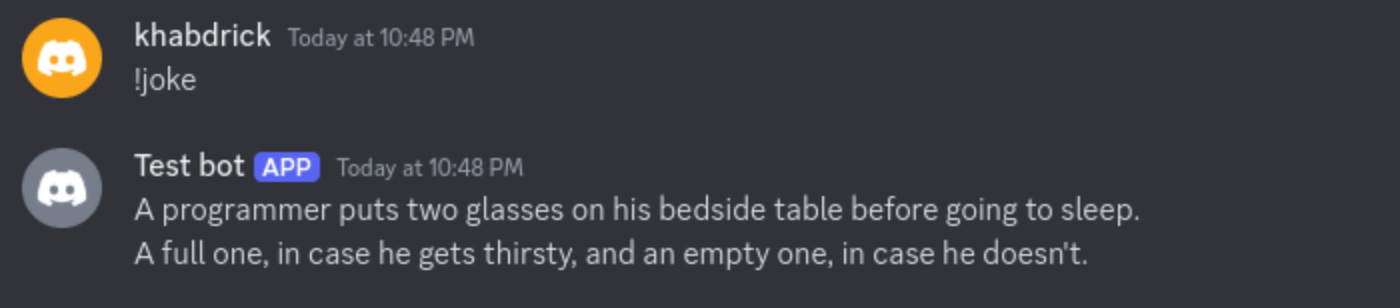
bot.py. Here, we modify the bot to add the!jokecommand, which fetches a random joke from the JokeAPI and sends it to the Discord server.import discord import os import requests from dotenv import load_dotenv from discord.ext import commands # Enable privileged intents intents = discord.Intents.default() intents.message_content = True bot = commands.Bot(command_prefix="!", intents=intents) load_dotenv() @bot.event async def on_ready(): print(f"Logged in as {bot.user}") # … other bot commands @bot.command() async def joke(ctx): # Fetch a random joke from JokeAPI url = "https://v2.jokeapi.dev/joke/Any?type=single" response = requests.get(url) # Check if the request was successful if response.status_code == 200: data = response.json() if data["type"] == "single": # Single-line joke joke = data["joke"] else: # Two-part joke (setup and delivery) joke = f"{data['setup']} \n\n{data['delivery']}" await ctx.send(joke) else: await ctx.send("Sorry, I couldn't fetch a joke at the moment. Please try again later.") TOKEN = os.getenv('DISCORD_TOKEN') bot.run(TOKEN)The
!jokecommand sends a request to the JokeAPI to fetch a random joke. The URL we use is https://v2.jokeapi.dev/joke/Any?type=single, which will return a single-line joke by default.We use
requests.get(url)to make a GET request to the JokeAPI and fetch the joke, if the response is successful(status_code == 200), the joke data is returned in JSON format.Finally, we send the joke to the Discord server using
await ctx.send(joke). If the API request fails, we send an error message to the Discord server. -
Restart the bot:
screen -r discord-bot python bot.py -
On your discord server, you will see that the new feature has been hosted successfully.

#Conclusion
You now have a Discord bot hosted on a VPS that runs continuously and securely. This setup allows for easy updates and scalability.
If your bot is expected to handle high traffic or many commands, performance optimization becomes important, so you might want to look into how you can set up a load balancer using tools like HAProxy or Nginx to distribute the traffic among multiple bot instances.