Docker Run Command: How to Create a Docker Container


In this tutorial, you will learn how to create a container from an image using the docker run command. In addition, you will learn the details of the docker run command and how to use the command flags and options to enable more container features.
#Prerequisites
You need to have installed Docker and have at least one image pulled that you will use to create a container.
Ready to supercharge your Docker infrastructure? Scale effortlessly and enjoy flexible storage with Cherry Servers bare metal or virtual servers. Eliminate infrastructure headaches with free 24/7 technical support, pay-as-you-go pricing, and global availability.
#What is the Docker run command?
The Docker engine uses the docker run command to create and start a container using the provided image. This command will also pull the image from DockerHub if needed. The process of creating a container also takes in specifications and options that will dictate how the container will run. For example, you can enable the container to run in the background and expose all ports to the host when building the container.
Therefore, it is important to have adequate knowledge on how to set the container specifications when creating and starting a container using the docker run command. Using various flags docker run enables you to configure the following:
- Setup network configurations and choose the suitable network mode or driver.
- Setup memory limits CPU to optimize resource allocation.
- Running the container in isolation.
- Determine what Docker should do when the container stops, should it automatically remove the container exits?
The docker run command uses the following layout:
docker container run [OPTIONS] IMAGE [COMMAND] [ARG]
Below is an explanation of the above command components:
- Image: This is the name of the image which will be used to create the container.
- Options: Options enable you to alter the behavior of the container. The
docker runcommand gives you the options of adding a custom name for the container you are building or binding a volume. There are many options you can add to thedocker runcommand, you will learn more about the options in the next sections. - Command: Docker run lets you add a command that will run inside the containers.
- ARG: You can add arguments to the command that will be running inside the container.
#How to create a container using Docker run
Now, let's use the following command to create a container called firstcherry using the crate image.
docker run --pull always --name firstcherry -d -p 8080:80 crate
You will get the following that gives the ID of the container and shows that the image used is up to date:
latest: Pulling from library/crate
Digest: sha256:ab43926a644347937f70f2d3e8cc5a4dd68442c69351e84c94b8c31a2a8601f2
Status: Image is up to date for crate:latest
6092afbbe291809df81a199eb4ca00e3d8975469584d5c9742241c0617ee9e90
To add a custom name to your container use the --name flag followed by a custom container name. If your container does not need an active terminal session and it is a long-running service, it is best you use the Docker detach mode which runs your container in the background. The detach mode can be enabled by using the --detach or -d for short. Containers in detached operate optimally just like those in the foreground.
The --publish or -p for short flag automatically exposes all available ports to the host machine and saves you time as you do not have to manually map every port to the host.
To ensure that your containers are secure and up to date, you should use the --pull flag which pulls a new image version every time you run or build the container. The --pull flag can be controlled using the following options.
- always
- missing
- never
You can check if the container has been created successfully using the following command that lists running containers:
docker ps
You will get the following output that shows the full details of the container you just created:

If you want to get full details about the container you just created, use the following command:
docker inspect [container name]
You can preserve memory and boost docker engine performance by removing unused containers. To automate this process of removing unused containers add the --rm flag. This flag will remove the container when the container exits and its services are no longer running. If you do not use the --rm flag you will have to remove containers manually.
The docker run command enables you to set environment variables when building the container. You can set the environment variables using the --env flag or -e for short. If you have saved the environment variables in a file you can read that file using the --env-file flag.
#How to configure container features using options
Below is a list of flags and options you can use to configure the way how your container runs when using the docker run command.
#1. Adding container privileges and Linux capabilities to execute advanced tasks
Not every container can carry out advanced tasks. For a container to execute advanced tasks it needs to be granted privileges to execute tasks such as:
- Managing network interface
- Managing system-level tasks
- Port binding privileged ports
Containers can be given privileged access using the --privileged flag. However, using this flag is highly not advised because privileged containers give cyberattackers access to the host system during a data breach. This is because privileged containers can bypass many docker boundaries. When cyber attackers have access to the host system they can exploit and steal more resources. Denying container privileges is also a way of reducing the impact of data loss or damage.
docker run --privileged --cap-add=NET_ADMIN --name secondcherry -d -p 8080:80 crate
Using the docker inspect command you can check if the container has been successfully granted privileges:
docker inspect secondcherry
You will get the following output that shows that the container has been given network administration capabilities:
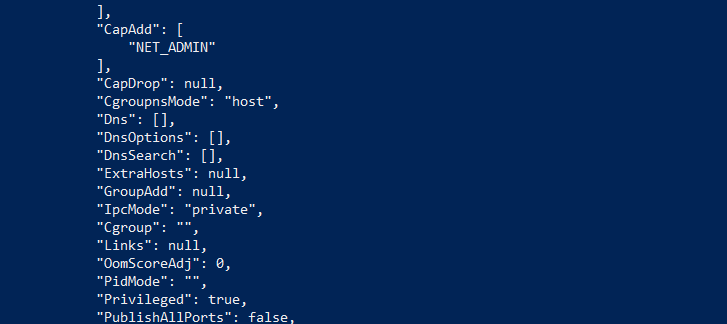
Another way of giving containers privilege is giving them Linux capabilities which offer fine-grained host access. The --cap-add flag is used to add Linux capabilities while the --cap-drop flag is used to remove Linux capabilities. When using the --cap-add flag you have to specify the capability value. For example, the SYS_PTRACE capability value allows the container to trace system calls while the NET_ADMIN capability value is used to give the container privileges to manage container network interface settings.
#2. Enabling logging streams
Logs are crucial for detailing the root cause of a container failure. Logs make it possible to debug, audit, and monitor container applications. To make container logging easier you can enable the container to print the standard input (STDIN), standard output(STDOUT), and standard error (STDERR). These data streams make it easy to sort data when analyzing logs. You can enable and capture these data streams using the --attach flag.
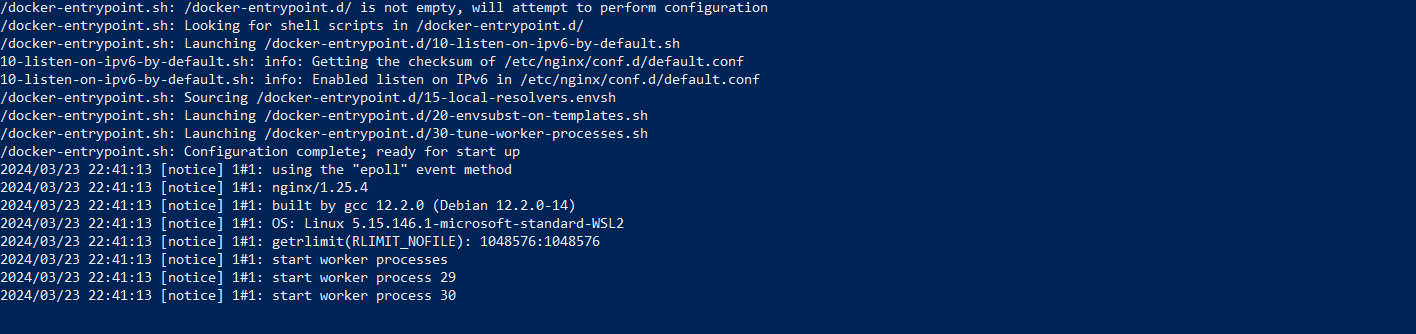
Use the following command to enable STDIN, STDOUT, STDERR. The -it flag enables interactive processes within the container and connects your terminal with the containers STDIN and STDOUT.
docker run -it --attach stdin --attach stdout --attach stderr --name logcontainers nginx
You will get the following output that shows container logs:
#3. Setting memory usage and compute limits
Compute and memory resources are crucial and expensive when using third-party cloud services. It is important to set memory limits to ensure that some containers do not over-consume resources while some containers receive insufficient compute resources. Fortunately, Docker offers 3 ways to manage memory and compute usage:
--cpu-period int: This flag is used to set a limit on the compute access bandwidth.--cpu-quota int: This flag is used in conjunction with the previous flag, it is used to set the maximum amount of time a container can get access to the compute bandwidth.--memory: This flag is used to set the maximum amount of memory a container can use. For example, a container can get a memory limit of 560m.
Below is an example of a command that sets memory limits and CPU limits:
docker run --cpu-period=100000 --cpu-quota=50000 --memory=256m --name thirdcherry -d -p 8080:80 crate
If you run the docker inspect command on the container you will get the information that confirms that the CPU quota and CPU period have been set.

#4. Configuring Docker network modes
The --network flag enables you to select a Docker network mode or driver that determines how the container should use the network features. This flag enables your container to receive traffic. Below are examples of network driver or mode you can set:
- Bridge: This default mode creates an internal private network that connects with the hosts and enables other containers to communicate with your container.
- Host: This mode creates a direct connection with the Docker host and removes isolation.
- None: This mode disables networking.
- Overlay: This mode enables your container to connect to multiple daemons together.
#5. Mounting volumes
Docker uses the --mount flag to attach files to your container. When using this flag you have to specify the type of file or mount you are attaching. Types of mounts are volume, bind, or tmpfs. After specifying the mount type you have to specify the source path of the mount and where the mount will be binded in the container.
docker run -d \
  --name=cratetest \
  --mount source=nginx-vol,destination=/usr/share/nginx/html,readonly \
  crate:latest
In Docker and DevOps volumes are file systems stored outside Docker containers and managed by Docker engine to provide data persistence and data sharing between containers. To add a volume to your container you use the --volume flag. This flag requires you to specify:
- The host machine path
- The container path
- State whether the volume is read only or not
Also read: How to uninstall Docker
#Conclusion
In this guide, we have learned how to create and start a container using the docker run command. In addition, we have learned how to configure the container using different flags such as --detach and --rm.